
Climb Mount Niitaka!

The top section of the ascent.
Well okay, what I’ve nicknamed Mt. Niitaka is actually a high hill on the outskirts of the Hassayampa River Canyon Wilderness at Wickenburg, Arizona, where Rincon Road plays itself out into other dirt paths. The lower approach going up the hill is actually the worst as far as pitching and heaving goes, mainly because it looks flat, but isn’t. You don’t know it’s coming, and a walking pace is way too fast. Then, suddenly, the truck is tipping left and right with a vengeance, and for no apparent reason.

This is the basic approach up the mountain, which I previously wasn’t able to climb in 2WD on all-season street tires. Now, with the camper in back and some serious Coopers, it’s do-able, with slippage. 4WD low makes it much easier all-around.
But I’m getting ahead of myself. This “day of the climb” began an hour and a half north, in Prescott AZ. My delivering dealer for my FWC camper, Adventure Trailer, was to reposition the camper in the bed of the Ford Super Duty, A.K.A the “Mighty Furd”. It’s rearward end had somehow shifted to one side, and a mount tension adjuster had bent. It had most likely done so on the more challenging descent from this same hill.
Adventure Trailer has been delivering Four Wheel campers for awhile now, and as a dealer, there ain’t no plaid suits and cigars here. I’d say the bulk of their business is modifying customers’ 4WD vehicles for better off-road duty. I would have used the word “performance”, but that connotes speed, as in racing. Four-wheeling is about successfully making it to Point B, preferably without undue hardship or getting lost. They don’t offer anything that they haven’t personally field tested and deemed worthy. The remainder of their business is to order and install FWC pop-up truck campers for customers, build true off-road trailers, and now rooftop camping tents for pickup trucks. At the time of my visit, at least six campers were there, perhaps two of which might be stocked units. The rest were customer orders awaiting installation.
So, they’re not noobs when it comes to experience with FWC campers, their installation, and how they do what they do out in the field. Looking at my Grandby, they were surprised to find that one of the front mounts was now loose as well. I asked if they’d seen such a side-shift as I had, and they said no. I asked if they’d ever seen a stretch-damaged adjuster, and that was no as well. Had they put many Grandby’s in 3/4-ton trucks? Oh yes, on that one – that’s because most half-tons will need mods to safely handle a Grandby filled with sufficient crapola for an extended trip. The popular “shell” model, stripped of interior features, options and some of its storage space, is significantly lighter.
So, determined to find some cause other than an “oops” in the last installation, or perhaps taking the descent of Mt. Niitaka too rapidly, I expressed concern that maybe the Furd’s uprated front spring option was inducing more twist in the long frame than the Grandby could handle. That one, they shot down confidently. “Nope, they really are made for it. Twist can’t be the problem on this truck. Toyotas are much worse for frame flex. You can swing out the spare tire carrier and watch the frame droop.” I wondered if they weren’t thinking of the side of the bed, but tying a spare tire mount to that instead of the bumper would make no sense. Whatever. So I like to think that the earlier reinstallation to add the spacer plates was a little off, which rough hill descent took advantage of and made worse. Since I’ll now be duplicating that run, we’ll see if the results now are any better. AT was able to reposition the camper in the bed without my having to unload anything to remove weight (thanks to a side-slope in their driveway – it took three of us), and they tightened up and locked all the mounts. I was out of there in minutes.

The side trail to the left is steep, loose, narrow, has a sturdy tree branch too low for the 8-foot high camper, and a slant to aim the camper into same.

It also has a tall projecting rock near center, with some steel rubbed into it, and a dark stain surrounding and below. Oops.
At the top of the hill approach are two side trails. The one to the left is steeper and looser, with plant growth keeping it narrow enough for a Jeep, and that’s about it. The one on the right is not particularly steep and presents no traction problems (in 4WD). It would be a slam-dunk if it weren’t for the last 40 feet or so, which contain a couple of undulations easily deep enough to bend the front bike carrier, and conspire with projecting rocks to threaten the diff carriers but probably not the oil pan. This is one of those sections that you need to get out and look first, in order to work out a “least problems” path. I took many photos of this area from several angles, but they all appear flat in the same way that they are in the video below. In this relatively convenient location, since the e-bike is usable and the cellular signal strong, carelessness on my part would merely be crushingly expensive rather than potentially lethal. Without a spotter, I had no idea how much clearance I had and where, whether my path needed some adjustment, or what. I idled up.

The side trail to the right looks easy, and is. Just don’t screw up the last few feet of it.
I wanted to see if it might be practical to videotape off-road sections like this. Most such things are done by an observer, so when running solo, getting decent footage is hard. Camera position is locked, and following the vehicle with zoom or pan isn’t going to happen without a concentrated injection of cash. Oh well. Fortunately, this crippled ability to obtain interesting video meshes nicely with my overall production values.

Photographing a difficult section from above didn’t show depths easily able to bend the main stem of the front bike carrier. Looking through the lens flattens it all out.
What I hoped to do in this climb was to get some test footage from my two cameras, in order to get a start on which one to rely on, and where to place it. First, I have an old consumer cam from the year 2000, a Panasonic Palmcorder PV-DV400, which records onto DV (digital video) tape cassettes. DV tape cassettes can handle what’s called Standard Definition, which is what broadcast TV generally uses. With a really good videocam recording onto it, DV tape can produce sharp images with very nice color saturation and tinting. Cheap consumer cams like the Panasonic tend to produce fuzzy, washed out images. My quest here was to determine just how bad the problem was, because the other side of that coin is that even at standard recording speeds, DV tape can record forever. There’s no need to rush once the tape is rolling. I have a lot of tape, and a lot of batteries. Multiple takes or long events are not an issue, at least until the results are finally transferred to your computer’s hard drive. The videocam is very lightweight and compact, making usage and mounting less of an effort.

Once up on top of the ridge, much of the view to the side of the trail looks like this. In another month, many blooms will be seen.
Contender Two is a 2008-model Pentax K-7 DSLR photo camera. It happened to be one of the first DSLRs to add an assortment of more serious video capabilities, albeit with many limitations: some of its screen size choices are quirky, and it can’t auto-refocus on the fly. If your subject is coming closer, you must either refocus manually as best you can, or set the exposure such that depth of field is maximized. Mind you, Hollywood has done it this way from the very start (and still does), and so DSLRs have made wide inroads into ads, documentaries, and other low-budget work. If you see movie credits with the job “puller” or “focus puller” and someone’s name, that’s the guy who stood there to one side of the camera and worked the lens. The cameraman can’t do his thing and track focus too. The puller uses the pre-measurements taken during the rehearsal(s) and cranks the lens using the distance markings on the side, while the actors are careful to do their thing only at one or more marks in the set. Autofocus is not used, because you may not get what you think you’re going to get, and the ability to emphasize using focus completely disappears. As far as I’m aware, moviemaking has been tried with Canon DV videocams too, which had unmarked lenses. They watched monitors to try to keep up with focus, but when blown up to movie screen resolution, this proved unworkable.

Keep walking along, and views like this open up.
Contender Three would have been my iPhone 4s, which is lightweight, handy and provides a sharp HD image. It’s only too bad that mine records less than 20 seconds of video before its meager memory is filled. I’ll have to soldier on past.

Partly cloudy days may not be the best for solar power, but the shadows look nice on the surrounding terrain.
This comparison shot didn’t put the Pentax’s lack of autofocus to the test. That’ll be later, when I try it beside a trail on a tripod. My goal today was simply to find out whether one vantage point of the same event was inherently more satisfying than the other, given that readjusting zoom to keep the screen filled with vehicle is not a possibility.
Viewing this video while using a cellular data account is a waste, frankly. It’s about 66MB. Consider it only if you are on broadband with no data limits, and have a low threshold of entertainment. Even then, consider that it’s two cameras with two viewpoints, one after the other. It really is test footage.
My own reaction to this footage is that for plain image quality, the charitable outlook is to say that the old Panasonic videocam is step up from having no video device at all. It’s pretty fuzzy, despite its resolution being officially specified at 525 lines, which I suspect is similar to 525p. Since this blog only accommodates image widths up to 550 pixels, any resolution above that is essentially wasted. That makes the very lowest end of HD video, 720p HD, overkill here. Many old consumer DV videocams like the Panasonic try to omit or hide their resolution – I’ve seen it down to 330 lines, which gets pretty murky. And I’ve seen 720p Standard Definition on DV tape from the same era that was crisp and colorful. So it’s not the medium. It’s the camera. And note that the Panasonic’s output, washed out and off-color as it is, had to be pumped up in the computer to even look as poor as it does here.
For this shot, the Pentax was mounted on a special (but affordable) automotive mount, kind of a very short tripod with suction cups. It’s called the Delkin Devices Fat Gecko Triple Mount. Except for the head, which allows the camera to swivel too easily, it seems to work well. For image quality, the Pentax K-7 is obviously the winner, but the question becomes the difficulty factor in playing with menus to get the depth of field where it needs to be when it’s on a tripod trying to fake what the Panasonic is already doing with its autofocus. There’s no such need when mounted to the vehicle. But as a general event recording device, the Pentax is not well suited to capturing anything that moves rapidly from one side to the other. The image distorts badly when panning, a trait shared by all other DSLRs because of the way their shutters work. They may output high quality video, but they aren’t flexible enough for general video work.
Using the Pentax on the camper’s window, note how smooth the trail appears, and yet the truck cab and left front tire are wiggling about a bit. It’s plain that the camper is using momentum and bed flex to stay relatively stationary. Between that and the camera’s ability to make the trail look featureless, this trial of the Pentax turned out far from optimum. Ignoring focus issues and picking the Pentax just for its cleaner, better images also carries a file size issue. At its lowest resolution frame size, 640×416, and either a medium or low quality level, it still eats memory at a rate of 30-60 megabytes per minute. That adds up, not just in memory cards for the camera, but also in hard drive space, or in my case solid-state drive space.
So if the emphasis is to reveal the nature of the trail, the camper’s side window is not the proper place to plant a camera. I’ll have to try an alternate on the Ford’s interior, or perhaps exterior body if the rather strong suction cups don’t threaten the sheet metal. The descent is coming up in a few days, as well as a forced march to higher altitudes due to warming temps, so test #2 should be sooner than later.

This is the view from the rear of the camper, which is facing eastward. Up here, sunrise suddenly jumped ahead by an hour, compared to the valleys!
I’m obviously loathe to acquire new equipment, both from a cost and overkill standpoint. It’s usually best to learn with what you already have. A new 4K videocam may be great, but for display on a little piece of web page, it’s money and capability thrown away. I’m not even sure I’ll pursue video as a regular thing, given the limitations I have. It may be fun as a process, but I’m not finding much to be impressed with so far. Even the photos aren’t revealing the real trail situations here.
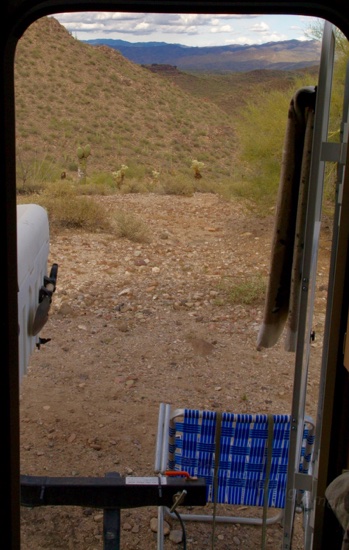
This is my view out the back door.
Aside from cameras, what stood out for me was the distant trail shot showing the occasional tipping of the rig from side to side. It occurs more quickly that I would have expected to see, or maybe I’m just used to seeing the bog-slow tipping of taller, heavier campers. That’s still a lot of weight to move that quickly. Since the coming descent around a loop is considerably more challenging, I’ll have to noodle over how I want to capture it.

The “summit” reached, the Intrepid has earned its campsite.
All this photography stuff aside, I find the solitude of this campsite to be restorative. It’s wonderfully quiet, and after a pleasant walk to examine the trail challenges ahead, I can smoke my pipe and contemplate the overwhelming number of voyage choices presented in the used copy of Backcountry Adventures Arizona (by Peter Massey) that I just picked up. Life is hard.

I enjoyed these videos very much, especially the lower quality one that shows how you pick your way along, dipping in and out of holes. I feel that I’ve learned something from it, maybe how to proceed sanely on a dirt road?
I think a lower mounting point on the truck might show interesting footage or more of the roughness of the road? But then you may run the risk of wiping the camera off on a rock or bush!
Now I wish that I had 4WD, seeing how you have used it on the roads you’ve taken so far with the Intrepid. However, with the gas prices in our town, I’m mostly very happy to be driving the lowest gas guzzling truck that I could choose.
I liked that aspect too, though it would have been nice to see what it was actually dealing with as it went along. My goal is mainly to keep the tires out of ruts and keep the diff housings clear of high points. If I must cross one, the goal is to figure out how I’m least likely to dig in the front carrier post, avoid contacting the running boards, or flatten the tailpipes on the right rear. I like to think that the solid front axle is running interference for the oil pan and trans pan, but the terrain features can get around that. Skid plates would have been nice.
I think you’re right on the lower camera mount point.
You can do quite a bit with weight in the back and a limited slip diff. But I’d hesitate to try anything obnoxious running solo with a 2WD rig, since there’s no shift to 4WD to get yourself back out of a situation. Makes things like a shovel, traction board, tire chains, hand winch and so on go from recommended to mandatory. Or, you can enjoy trails but not forge ahead on anything that will push the envelope. There are many picturesque dirt roads that are rated for cars and/or high-clearance vehicles, you just have to methodically search them out in books and online references. On a scale of ten, I’m limited to trails rated four at the worst, because of the overhang and ground clearance issues, so it’s not like I can forge new paths to rock-crawling adventure. I use 4WD mainly to extricate myself from deep sand or gravel that I got myself into with 2WD – and that’s most commonly on highway shoulders! – or to crawl up hills that would otherwise stress the drivetrain. I would not have made it up to this campsite without 4WD, but there are two other 2WD-accessible spots I’ve spotted in the same area, short of the final rise.
I forget now, what are the publications that you use to search out trails to take with your truck?
How are you liking the toilet? Will we get a post some time on how your rig is working out for day to day living? Your trips so far are looking very nice, scenery wise.
I just came back from a too brief 4 days in the woods off the Fraser canyon, can’t wait for the next trip in May.
You’ve forgotten publications because I don’t think I’ve mentioned it, Ming. I splurged on half-a-dozen states-worth of Benchmark Atlases at the start, based on “you really need this” recommendations on Amazon-affiliated websites. Many swear by them, but I’m still trying unsuccessfully to justify the cost. They show only major trails of course, and are way short on detail. They’re better for finding pay campgrounds than anything else. They list a few attractions and touristy stuff, but very few are places I’d care to actually go to. As far as hauling the TT went, they were useless. Using Google Maps, I was able to visually examine rest stops and purported campsites for appropriateness for the Defiant. It was a fit and maneuverability problem, with some indications of probable trail roughness. I could also easily plan out the mileage for each leg of the trip, getting quick info to adjust the leg distance and locate Plan B stops. Searching out trails for isolated camping spots was never a possibility.
There’s been no time to plan out the fiasco I’ve started now, so I’m winging it. I just received used print copies of Backcountry Adventures: Arizona and Backcountry Adventures: Utah for research, since they grade trails by difficulty, which I need to pay attention to. Most online trail info is assumed to be for group tours of Jeeps, ATVs or motorcycles, which is a hazardous assumption for a lone stock full-size truck. Though my main interest is actually out of the way campsites and not 4×4 overlanding on trails to get to them, the books offer some interesting direct point-to-point paths, what to expect, what to watch out for, miles, typical fastest time, and so on. They also offer histories of how the trails originated, town histories, major players, places not to miss and why, etc. Flora and fauna, wildlife, you name it. Even used, expensive but worth it to me. Trails change from erosion and often don’t go where I need them to, so what I need is often not in the book, but it’s still a help. I still rely, in the end, on Google Maps for the final planning or evaluation. A few trails just look like they pose problems, or may be marked on the map but seem to peter out to nothing from an actual overhead view, or cross a wash that may or may not pose a problem for a 10,000-pound vehicle, which is not a 4,000-pound Jeep with flotation tires. So my “4×4 off-roading adventures” may be few, but when available and there is time, they will hopefully get me to Point B without excessive adventure.
The C-Head toilet is working well so far. Closed up or stored, odor is zero. I need to correspond with the maker before I do any update. I will cough up an item by item status of how the features and various mods are each working out, but in general, with the exception of the petulant Outback solar controller, the whole rig is sleeving together pretty nicely. What it’s like to live in, coming from a TT, should include the attitude shift needed. I’m always left a little uncertain when a rig review starts as a hard sell of perfection itself, and later they’re making mods to it because certain features were actually pretty marginal or proved a problem.
Glad you got away for awhile!
Hey Doug…been following your posts for a while now and just want to say thanks for some good info. We recently bought a Grandby which we’ll take delivery on in May. It’ll go on our 2006 6.0L F-250 SB, so you’re write-ups are very applicable to the rig we’ll have. I particularly enjoyed the video…my favorite part was just listening to the diesel under no strain at all as it crawled up the slope!
My plan is to do some “off-roading” in Wyoming this summer similar to what your interests are. This is our first truck camper, so we’ll have some learning to do with the new “load” on the truck.
Please keep up your reports on your venture…I’ll be following along!
Cardwell
Many thanks for checking in, Cardwell! The Mighty Furd is my first diesel vehicle, and the difference in characteristics is startling, at first. As you already know, there’s no such thing as stomping the gas or gunning it to get over things. In 4-Low, the gas pedal requires a deft touch to avoid snapping your neck like a chicken, or losing cargo. Going up the slope in the video, the engine sounds like it was idling, but I was holding it just barely above, which is not so easy on ground rough enough to make me bounce in the seat. That’s when it gets a little YouTube-ish. I keep thinking that something in the drivetrain just has to snap, but no problems so far.
At any rate, I’m sure you’ll enjoy your own Grandby at least as much as I am mine. The trips you’ll be doing with it are precisely what its designed for. So filter what I write about mine, keeping in mind that I’m packed for seven or eight months, carrying gear that very few RVers would bother or need to, and have stuffed in more battery capacity (and weight) than is normal. And, more solar panel weight on the roof than is advisable, too. That you probably won’t need a cargo box or bike rack will transform where you can go, compared to my fretting online about this or that trail challenge. My downsides are all homemade! You guys are going to have some very enjoyable outings in some very nice locations up there, and you’ll be lucky to notice any differences in handling with the camper in place, too.