
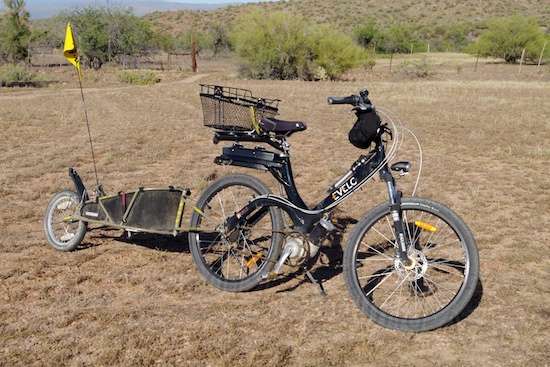
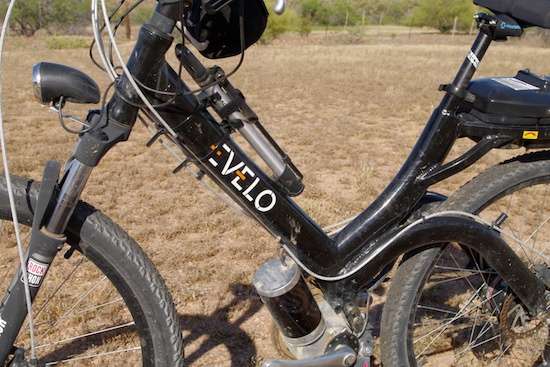
The Evelo Pack Mule

The Evelo Aurora, as delivered and assembled from the carton, later proved to be an excellent starting point for my needs.
[Please note that Evelo has seriously revamped all model lines for 2018 for the better, as well as doubled their original warranty, so this article will be of limited value. In the interim, they’ve also pumped up power on their older models and, as of May 2018, are offering these heavily-optioned “obsoletes” at giveaway prices. Dang!]
My Aurora is just one of several mid-drive e-bike models that Evelo offers, and I’ve optioned and equipped it with add-ons suitable for transforming it from a plain commuter into an e-bike fully suited for primary transportation duty in the Great Southwest. Whether exploring for the best potential campsites, doing grocery or laundry runs to the nearest towns, or taking me to local events and locales, it has to do it all. And, it has to do it reliably, day in and day out, while it lives outdoors 24/365.

My Aurora as it is today. It looks very similar because it is. With the exception of a front sprocket swap, all other detailing to make it a boondocking hauler was limited to bolt-ons that anyone can do.
If you’ve read some of my posts in the E-Bike Pack Mule Category, included in the list at the right border of this page, you know I pull no punches in describing my experiences, likes and dislikes with the Aurora. I’m posting this page primarily because, overall, my Aurora and Evelo’s Customer Service in particular have proven themselves to be almost an an icon for what an e-bike and the company that stands behind it should be. Most outfits will gladly sell you their e-bike and then hope that you won’t need anything from them after the sale. Their primary goal is to sell you their product, period, and that’s all they’re really equipped to do. Tying up capital in replacement parts is something they are often reluctant to do. Same for manning a help desk to provide prompt service.

Ready for light shopping or trash hauling errands in half a minute.
In contrast, Evelo wants to answer any questions you have while you’re making up your mind, hear from you after you’ve received your bike, and assist you in any way they can. Then, they want to know how you like it, how you use it, and what you need to be able to enjoy it more. Confused about something? Need to find aftermarket accessories that will fit? They want to help. Initially cynical in a “this must be a clever ploy” way, I’m now a believer. Sure, they want to sell bikes, and lots of them. But they also want you to be completely satisfied with whatever you purchase, and they have committed to the expense of the people and practices necessary to exceed expectations. And they do. That’s unusual, and worth getting the word out about. If there’s any “ploy”, it’s that they want your purchase and dealings with the company to be so positive an experience that you’ll want to tell your friends about it. That’s just good business, win-win. Sure, I’m a card carrying “Evelo Ambassador” now (place hand over heart), but I started pumping Evelos long before this. The bikes impress me, and so does the company behind them. I’m for any outfit that busts their chops to do the right thing the right way.
Take another minute to add a trailer, and it’s ready to head for town to drop off trash and do laundry, plus bring back some groceries.
There are several categories of e-bikes on the market, ranging from pricey high-performance sport e-bikes to models hardly worth pulling out of a dumpster. The combinations of drive types, battery options, technical features, and value for dollar can be confusing. In my view, all e-bikes are expensive. The only question is, will this or that feature be worth paying extra for? Evelo’s price point places them squarely in the affordable lower-middle ground of competent, serious e-bike transportation. They market to recreational riders and commuters, but the design and execution of its core engineering is sound enough to build a workhorse around. That’s why I picked it out from the myriad of choices I had in the e-bike marketplace. I had no brand loyalties or even preferences going in. But I did have a budget, and a pretty tough list of requirements.
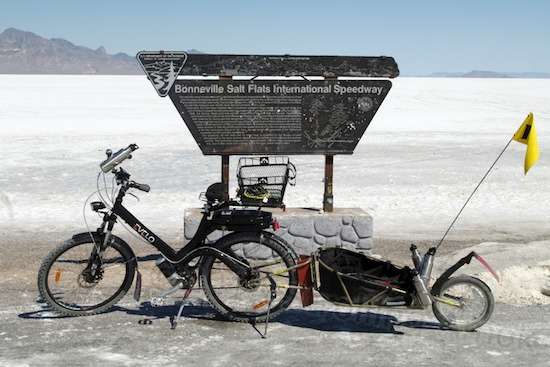
Take ten minutes to add full-boogie protective gear, and it’s ready to haul camera and video equipment onto the salt flats to capture land speed record attempts.
That list pretty much forced me to ignore the pull of marketing ploys and carefully-shaped brand image, calls to the “adventure lifestyle”, and “gnarly” features. I was trying to find a reliable hauler to get me and my intended loads up difficult slopes in the middle of nowhere. That doesn’t require a rebel outlook or rad features. It requires competent engineering suited to my uses. The search had to center on hardware, specs and features, not company size, market reputation, or popularity. Color coordination doesn’t help get you back to camp before sunset and 35-degree temperature drops.

This kind of climb separates which e-bikes are flatland runners, and which can tackle any job. Camp is down at the bottom, behind the hill. My own ability to pedal is quite limited, so this slope on loose dirt was nearly all on the Aurora’s motor.
The bolt-on modifications I’ve made to my Aurora don’t make it “better”, but simply tailor it to fit my individual comfort needs, as well as make it even more suitable for carrying sizable loads of stuff over notable distances, often over some pretty challenging terrain. Some mods are of a nature that many people would benefit from, while others are pretty peculiar, handy for only a niche of e-bike riders who are no longer in prime condition.
My Original Requirements List
Let me list my original perceived needs and wants in an orderly way, because those drove my own basic brand and model choices. It’s unlikely that you would share many of these, but that’s why picking an e-bike needs to be a thoughtful, individual process. In my case, it’s all about dry or boondock camping, and keeping my tow vehicle out of the action as often as possible. Simply buying an e-bike because that’s what a lot of other people are buying is not a good idea unless hobby riding on suburban streets is all you want to do. Making your own duty and features lists makes choosing the most appropriate bike much simpler.
Tasks:
Errands and grocery shopping trips involving distances up to 20 miles one-way. Some towns within this range can be safely accessed by bicycle, while others pose an unacceptable traffic risk, so range doesn’t guarantee access, but it sure helps when a longer, alternate path can be used. Google Maps and a GPS are your friends here, and if you’re uneasy with this task on a bicycle, the traffic-matching qualities of a motorcycle might be a better choice, but that comes with its own drawbacks.
Campsite area scouting to locate approachable sites for the Defiant (and prevent Bad Trailering Experiences). This is the price you pay when you want to boondock in the spacious, decadent luxury of a big, tail-dragging vintage tub like the Defiant. You find a place to park near the entrance and break out the bike. Trust me, it’s worth it, especially if you can very easily dismount the bike from its carrier and cover some serious ground without expending much physical effort or time. If you haven’t found an accessible, decent site or turnaround area within a few miles, it’s time to move on. This is where selecting a quick-release bike carrier pays off. You have to look at the whole thing as a system, or it’ll take you five minutes to unstrap and unscrew your superb bike from its make-do, Rube Goldberg rack. Perceive something as a pain in the neck, and you’re going to avoid doing it, and then have to deal with the result.
Area exploration. Tourista! I’m tired of missing the sights because I’m reluctant to add a lot of nonessential miles to the Mighty Furd, most especially crawling down rough dirt trails and short trips at 9 MPG. The thing’s design is biased toward hard towing work at speed, so prolonged idling and not getting up to full temperature will lead to incredibly expensive maintenance issues in the long run. It’s right there in the manual, though the wording is more upbeat. I’m voting for a long, happy life for it. A bike is just a better way to explore and experience anyway, as long as there are no critters around with an ingrained chase instinct, lovable family members named Pookie or Kujo included.
Exercise. If I want to stay upright and ambulatory in my doddering old age, I have to get out there and redistribute some sludge around my circulatory system. Regularly. Since I’m often unenthusiastic about taking invigorating hiking exercise in the magnificent Great Outdoors, but like biking, it’s a good way to prod myself out of my sincere devotion to lethargy. An e-bike simply dampens the overly-demanding segments of any ride, preventing overexertion and the medical problems that would result, in my case. Lengthy exercise = good. Busting a gut = bad to very bad.
My must-haves:
- An upright, cruiser-style pedaling position, to get weight off my wrists and hands. Manning up to numbness and pain is not all it’s cracked up to be.
- A front suspension, also to ease the stress of rocks and washboard gravel on my wrists.
Alternative: really, really fat tires, though they have a very high rolling resistance that cuts battery range. - A fully enclosed multi-speed hub of some type, to allow a full set of gear choices without the pronounced vulnerability to damage and filth that derailleurs have.
- A mid-drive motor, to make it a little more likely to make that next hill without absolutely trashing the battery range or my own circulatory system. I’m willing to trade flatland range for that, if necessary. I can pedal a bike on the flats, but what I can no longer do is huff it up hills.
- Full-coverage fenders, to decrease the corrosive effects of getting out there to see the action on the Bonneville Salt Flats. Yes, I really want to view this at least once. Except for Bonneville, fenders aren’t needed, so demountable ones would be even better.
- Controls that include both a throttle for no-pedaling cruising, and pedal-assist for automatic, on-demand help during pedaling. Adaptability to different situations.
- The power to pull a bike trailer large enough to haul forty pounds of groceries over the trails I normally encounter. Sometimes it’s easy, often it’s not.
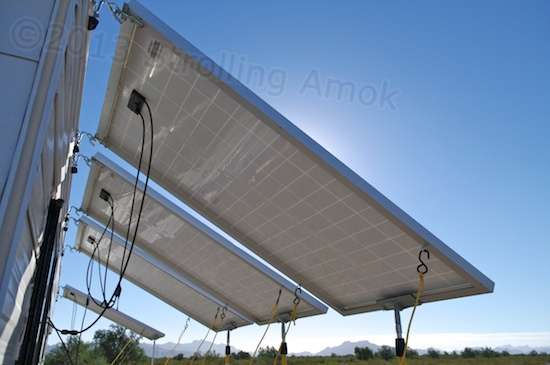
- The ability to recharge using my existing solar setup. In other words, the battery charger shouldn’t pull much more than 200 watts max, nor exceed a 6-8 hour recharge time. I can technically hit 300 watts, but that would limit recharging to daytime only, on full-sun days only. Not a good idea for a primary form of transport. Not every place is like sunny Arizona, and sometimes Arizona isn’t, either. (UPDATE: With the Intrepid truck camper replacing the Defiant TT, available charging power has downgraded to 150 watts.)
- Basic weather-resistance of the electrical system, electronics and bearings. True weatherproofing would be nice, but MIL-Spec bikes just don’t exist.
- An ability to carry at least a couple of sizable water bottles. It’s dry out there, and keeping water available is a lot more than a refreshing convenience.
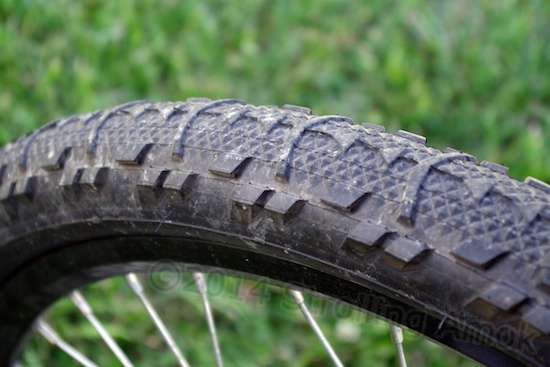
- Middleweight 26″ tires, at a minimum. Thick gravel and especially sand have a way of undoing narrow front tires, making the bike want to lose steering and dump you.
My wants:
- A step-through frame to allow easy mounting, especially with a loaded rear basket sticking up.
- An ability to somehow mount and use my existing Garmin GPS, which can lay a route for me among many (but not all) of the major trails in addition to regular roads. The ability to power it would be even better, since it can run on its own internal battery for only so long.
- An ability to have/mount racks and baskets or bags for item storage for groceries, packages, or camera equipment.
- A technical round-trip capability of 60 miles. That’ll require carrying a spare battery, but that’s acceptable as long as there’s some way to carry it. Trips in many areas will be less than 10 miles. Many of those miles may be without pedaling. (UPDATE: This has downgraded to just 20 miles, for medical and risk-related reasons in the time period since.)
What Made the Aurora the Best Choice for Me?
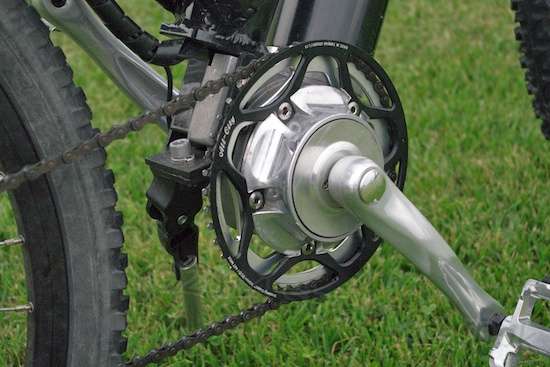
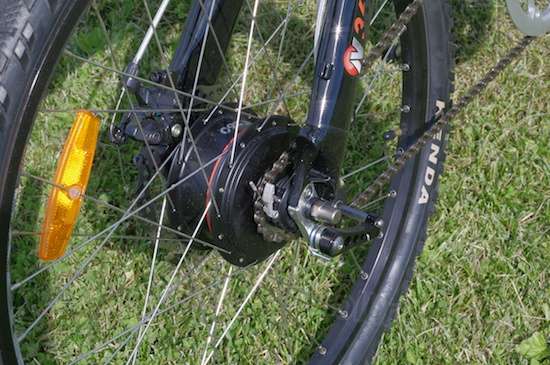
 Its mid-drive motor, common to all Evelos. Mounting the motor at the crankset allows it to share the bike’s geartrain, the same one you use while you pedal. This system allows the power of the motor to be used more efficiently, giving it more leverage to tackle uphill grinds, as well as allowing you to minimize the power used on level ground, at whatever speed you like. Just as you benefit from changing gears, so does the motor. Common hub motors (which turn the wheel directly) generally have one fixed gear ratio sized for the flats (if they use gears at all), and get no such leverage advantage. That single gear ratio tends to require using more wattage and more aggressive pedaling to muscle up the same hills, and that cuts both battery range and motor lifespan. 250-watt hub motors are considered a very marginal motor size, while 250-watt mid-drives are not. I initially had concerns that adding electric power to the bike’s chain would wear it out quickly. Now, in use, I realize that the amount of added motor power is well within the drivetrain’s capabilities. Keep it clean and lubricated – as you should any bicycle chain – and it will serve you well.
 The availability of an optional 500-watt, 48V motor. For suburban, recreational riding, the Aurora’s standard 250-watt, 36-volt motor will take you up hill and down dale just fine. That lowers the initial cost of the e-bike and, with the mid-motor’s gearing advantage, makes the standard motor adaptable to different terrain, with better range overall. The onboard watt meter doesn’t lie. But, tack on a heavily-laden bike trailer, or tackle grades that would leave you wheezing by the side of the road, and the 500-watt motor is my definite recommendation. It’s also my recommendation if, like me, you need regular and sustained exercise but have strict limits on the degree of exertion you should be putting out. Only you know where you’ll be riding yours, but I advise you not to skimp on motor power if the roads that you now ride on your plain bicycle make you stand on the pedals, inch along in the lowest gear, or make you get off and walk it. The greater power makes a considerable difference in maintaining a higher average speed when the going gets tough, yet draws no more power than the standard motor when its extra torque isn’t needed. That allows you the freedom to prioritize for high battery range, or high speed with maximum assistance. For me, the considerable cost to upgrade was a no-brainer, but for you it may be unnecessary.
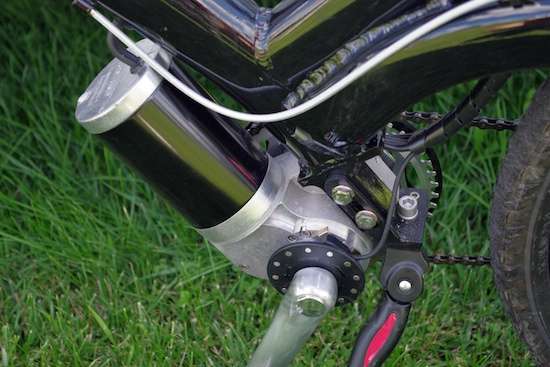
 It’s weather-resistant. This is a big concern with me, because my e-bike will never see the inside of a garage or the shade of an awning. The Evelo’s electronics are weather-protected, and the whole bike withstands rain very well. You wouldn’t want to pressure wash it, because it’s not weather-proof, but it’s sealed where it needs to be for outdoor use. Garages and even slip-on bike covers help in the long run, especially where morning condensation is frequent, but overall, the Evelo is not vulnerable to problems.
-

(Photo liberated from Evelo.)
Reliability. Although the mid-drive system is more complex than hub drives, it is engineered well, and can be expected to last for many, many miles. Two Evelos have been ridden across America from sea to sea in a promotional test ride, and my own is showing no less capability so far. It simply runs like a refrigerator. Get on, and go. A hub motor drive should in theory be more reliable because it’s simpler, but that potential is usually compromised by such things as nylon gear rings. I’m not seeing any unreliability in the Evelo that would need improving upon. It appears to be a paper debate.
 The availability of its optional NuVinci N360 stepless gearhub in place of derailleur gears. Practically impervious to the elements and common parking spills, the NuVinci N360 lacks the finicky and vulnerable nature of common derailleur gearchangers. The mud and the pervasive dust of the Southwest don’t phase it. My own experience with it has shown its lack of fixed gear steps to be a positive boon. There are no fixed ratios – it’s continuously variable. So, it’s an easy matter to tweak its control collar just a skooch to get exactly the pedaling speed (cadence) you want, and/or measurably decrease the motor power needed at any given road speed. You just make your adjustment and watch the results on the onboard watt meter. The total range of ratios available exceeds many road-oriented derailleurs. Another big, big plus is that it deftly shifts under full power, so changing ratios doesn’t require any momentary letup in pedaling or throttle to shift, which makes sudden uphill charges a smooth, uninterrupted, reliable affair. No more clunks, failed shifts, and cursing as you lurch to an abrupt halt at the bottom of a steep climb. (UPDATE: With age, the NuVinci needs power reduced in order to upshift, but can still downshift no matter what.)
 Both pedal-assist and throttle controls, standard. There are five levels of motor assist available for pedaling, and the throttle makes it possible for me to take a break without stopping. It’s also handy to get rolling from a standing start when necessary, especially when starting uphill or hauling a load. And, you can just goose it over hills when you don’t want to gear down or change the level of pedal-assist. (This is where the 500-watt motor really comes to the fore.)
 Commendable battery range. Range is up to you, depending on terrain, wind, and your chosen speed. Evelo advertises up to 20 miles just on motor power, with no pedaling. Or, 20-40 miles when you pedal. That’s pretty accurate. Pedaling with the extra weight of my trailer attached, I tend to clear 32 miles per charge at minimum, and 39 miles on a lucky day. Running solo and conservatively, I suspect it can easily clear 40 miles. The worst I’ve seen so far in very tough conditions is 23 miles. Use no higher Pedal Assist Level than you need to hold 8-10 MPH, and you’re pretty likely to get it home no matter where you are or how far you’ve gone. If max distance isn’t a concern, you can ramp up speed, and go for it. The standard 10Ah lithium battery pack is a common capacity, and that’s what I have. The Aurora’s standard 36V system also offers the option to upgrade to a 17Ah pack for even greater range, but my 500-watt/48V system does not. (UPDATE: A 15Ah battery became available later.) Doesn’t matter much – it’s range is fine for me, and I sometimes carry a spare on long, demanding trips, or when I know the installed pack already has considerable use. Depending on Evelo’s pricing, a spare battery tends to be the more cost-effective way to add battery capacity. The downside of this choice is that you’ll need a way to carry the bulky spare with you, while the 17Ah pack boosts range without needing to carry a backup.
 Rechargeable on my solar system. Recharging can take 4-6 hours like Evelo claims, and the 48V charger draws about 120 watts of power to do that. I’m told that the 36V system draws just 90 watts. Using a small inverter to power the charger is well within the capabilities of my system, even for an overnight charge. You don’t boondock/camp full-time on solar power, so you won’t care about such things, but if I can’t recharge the e-bike’s battery, I suddenly have an occasional toy, not primary transportation.
 It has a step-through frame. Maybe you can still swing your leg over a loaded rear basket and seat, and if so, congratulations! Not me. I can do it by leaning the bike way over, but why not just step though it and go, without the gymnastics?
 It’s standard 2.1″-wide tires, which are a bit wider than the urban Luna’s 1.9’s. It makes a difference off-road on loose surfaces. The Aurora will accept wider off-road tires if needed. The Luna’s tire clearances may be more limiting, depending on how its fender stays are configured.
 Its battery is easily removed for in-home charging or replacement with a charged spare. It can of course be recharged in-place too, but when an e-bike is used for serious daily transport or at maximum speed, waiting for its battery to recharge can knock you right into the next day, or leave you pedaling a heavy e-bike without any motor assist. Plus, the battery can lock in place with a key, which discourages impulse theft.
 Its USB charging port. Since I occasionally use a Garmin GPS with a self-contained battery, it’s okay for short trips. Longer trips require a USB power source, and a port on the side of the Aurora’s controller can be switched on to power the GPS right from the bike’s main battery. That’s handy, and considering the trails I travel on and the need to minimize miles traveled in town between stops, it may prove important. For you, it lets you listen to your iPod or recharge your cellphone on the fly.
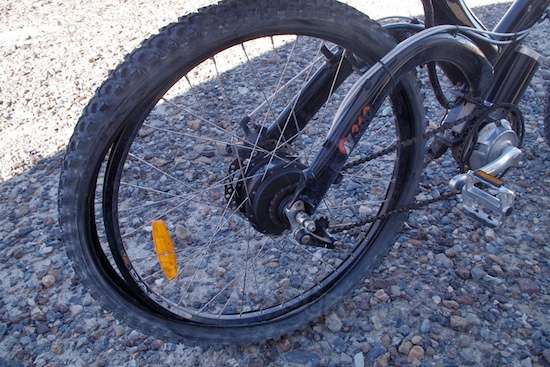
 An ability to easily remove and repair tires. The Evelo’s mid-drive motor layout allows rapid access to tires and tubes without having to disembowel anything. The standard derailleur model requires no tools to remove the rear wheel. The NuVinci gearhub allows removal with a standard wrench. Without a motor inside the wheel hub, there are no electrical wires to disconnect, and nothing to readjust. There are two shifter control wires however, but these have quick disconnects. This can be a significant advantage in the outback, underscoring the differences between recreational hobby riding, and getting frozen or refrigerated food back to camp before it gets warm. It also slims the “toast factor” ordeal of repairing a puncture in the hot Southwest sun.
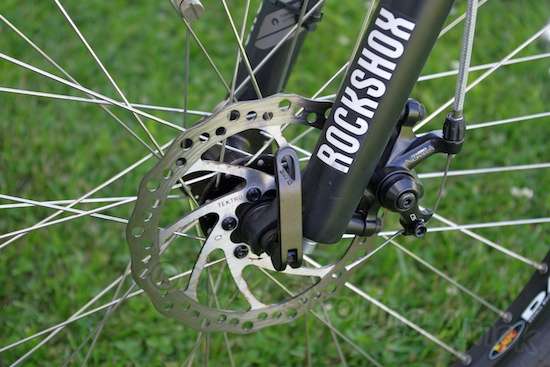
 Dual Tektro Novello mechanical disk brakes. In practice, these are more reliable than stink in a pig farm. And power to the motor is instantly cut at the start of any application of them. Smooth and fade-resistant.
- Out-of-warranty replacement parts are readily orderable on the manufacturer’s website, or by simply calling. This is another biggie for me. Most of the Evelo’s parts, like the brakes, are standard bicycle fare, available at any bike shop. I’m talking about the parts unique to the Evelo. There are parts that, through mishap, break. And there are parts that simply wear out in the long run. Many other e-bike manufacturers stonewall on parts listings because they prefer to push the “what could go wrong?” ploy. In reality, it’s a hint that replacing whatever you break or wear out may be an arduous process, if it can be done at all. They figure that if their e-bike breaks a day out of warranty, they now have the opportunity to talk you into “upgrading” to a new one, whatever, not their problem. It’s a disposable recreational device, right? My impression of Evelo’s viewpoint is that they expect you to be able to keep using your Evelo e-bike until you run it into the ground, at which point a replacement finally begins to make financial sense. They want you to like your Evelo e-bike, and to make it easy for you to keep riding the darned thing for years.
- Old-School Customer Service. I don’t know about you, but I no longer have “disposable income”, or money that can be wasted on an incorrect choice. Decent e-bikes are not disposable consumer products. I needed to research technical features and what aftermarket parts were already known to fit, and work. With heaps of emails going back and forth, plus a phone call or two, I was not what you’d call an easy sale. Different staff members with different experiences and areas of expertise were pulled in, and I got my questions answered, and promptly. If I didn’t follow up in a timely way, they did, and contacted me to see where I was in my research. As you are painfully aware, this is not a normal business practice anymore, because it’s too expensive to do. It is normal with Evelo. Don’t these people ever go home? Now, after the sale, I know I can email them and get a courteous and helpful response to an adjustment or technical question within a day, not just a “business day”. A call gets an instant answer. That’s nice to know.


One paragraph of caution: With e-bikes becoming more popular as a way to get back on a bicycle for health’s sake, or to sideline the family car for all those local trips, there can be an impulsive tendency to view e-bikes as a sort of electric motorcycle. They aren’t. When you ask “how fast will it go?” the answer will still be up to you and your state of health and fitness. Regardless of features, street-legal e-bikes are pedal-assisted devices designed to use a limited amount of onboard electrical energy to help you, the prime power source, to get where you need to go. Yes, they will enable you to tackle terrain that you might not be able to surmount on your own, and to travel distances that you never could before. But don’t expect to crack the throttle and surge up hills at breathtaking speeds on motor power alone. Regardless of motor choice, they don’t produce much more power than you (or perhaps a moderately fit cyclist) can produce. Much more expensive off-road-only sport e-bikes can reach flatland speeds that far exceed the Federal limit for streetable e-bikes (which is 20 MPH), but at a cost, both monetary and in battery range. I’m just cautioning you not to go in with gasoline-inspired expectations, at least not without a fat wallet and a willingness to give up its legal “bicycle” status. It’s a bicycle with an electric motor to help, not a scooter or a motorcycle with pedals. You won’t be tearin’ it up.
Why Modify?
The ergonomics for maximum human performance don’t always coincide with the ergonomics for comfort, or those necessary to avoid tissue injury. In other words, what your body needs to best perform a given task on a machine is likely to be distinctly different than what makes that machine comfortable to use when the pressure is off. And we are often perfectly willing to lose some money for better performance or looks, even if all we ever do is chuff around the block. Bikes intended for utility, light touring and errands should not share a sport bike’s ergonomics, because there is no positive payoff for the sacrifices made to get athletic performance gains. So to apply all of the components and ergonomics of a competitive road or mountain bike to a bicycle used to get to work every day can create physical consequences, and without any trophy or prize money to dull the eventual aches or numbed nerves.
You are unlikely to have to make any changes to any of Evelo’s e-bikes for normal recreational use. It is a superb basis for getting controlled exercise and for making bike riding more enjoyable. I started out using a decent mountain bike for local errands, but found that I could no longer handle the terrain I was encountering when living on the road. Since my goal was to find a reliable e-bike which could replace my tow vehicle for exploration and errands to the nearest town, that led me to construct a kind of “and it will need to be able to do this and this” list. The Aurora already nails the basics for capability, as outlined in the features I’ve listed above, such as its battery range, climbing ability, mix of both pedal-assist and throttle, an adaptability to both pavement and trail, its step-through frame, and so on. It had also nailed the basics for its “reliability potential” by traversing 4,000 miles in the “Trans-American Electric Bike Tour”, a promotional event I flash over at the bottom of this page. That kind of mileage and the specific mechanical problems encountered on that voyage helped get me planning toward what any high-mileage e-bike would face in the wild.
My Own Situation
The extra desired features revolve mainly around improving its hauling ability over rough surfaces and demanding slopes, and in moving the rider position from the traditional mountain bike “forward lean” to a fully upright position. Compared to a traditional commuter or mountain bike, neither change is quite as easy. But with the need to both replace a car and let me get to my destination without the ride resembling an endurance contest, both were essential. Plus, given the normal hazards of cycling in remote areas of the Great Southwest and Upper Midwest, absolute reliability was essential, too. Getting stranded miles from anywhere in the Southwest’s arid heat can be risky for the young, and quickly serious for the old.
A flat tire on an e-bike can do more than just damage the rim. It can quickly immobilize the bike while being walked along.
Given the Evelo’s basic reliability, this last enhancement simply means making the tires bulletproof against the pervasive goathead thorns in the Southwest, and being able to deal with the occasional flat tire regardless of cause. Bike tires are a far cry from automobile tires as far as puncture and abuse resistance goes. An e-bike’s extra weight, current deep-dish rim designs and lightweight tire constructions often prevent being able to walk an e-bike on a flat tire. When a bicycle is used as a high-functionality device, puncture resistance and ease of repair become critical, since walking a flat is no longer possible without first removing the tire and tube, to roll the bike on its bare wheel rim edges. That’s an expensive fallback. When Exalted Mother Nature turns her uncaring fangs your way, you need to be able to resume the trip atop the bike, on inflated rubber, and in a timely way.
You will hopefully not require converting the Aurora to an upright pedaling position. Evelo’s Luna model already offers this feature, but the urban-oriented Luna is limited to a 250-watt motor and wears slightly narrower tires. (UPDATE: They later made a 500-watt version available.) That makes it much less suited for my purposes of hauling heavy loads over fire roads and abrupt terrain. I’m not able to sustain much weight on my hands and wrists, so getting upright is an essential rather than a preference for me. I prefer lean-forward, but two miles of it is about my limit. The Luna was a better choice for comfort, but the Aurora was the better choice for power. That pushed my decision to alter an Aurora into resembling a more muscular, fat-tire Luna.
As far as hauling the goods goes, the Aurora is not the best candidate for being able to carry stuff onboard. Its stylish frame design and front suspension preclude simply strapping on standard baskets, racks and panniers. The options here are unusually limited, which points to the need to employ an external hauler – a trailer. That done, its innate mid-drive ability to pull heavy loads in bad conditions comes to the fore. There is a single, narrow caveat here, but I’ve detailed this in the trailer section below.
The Parts List
So, here are my modifications to my own Evelo Aurora, none of which affect the 18-month standard warranty. They are grouped according to intended purpose.
Comfort
I have some needs going in, and basically wanted to alter the 500-watt Aurora to become more like Evelo’s upright Luna model in order to let me stay on it for more than a few miles. Extensive seat time on bikes in my squandered youth led to eventual damage that prevented me from getting back on a traditional horned bike seat, and an early wrist injury and general wear and tear meant that more than a few minutes of leaning forward onto the handlebar led to pain and numb hands. When you can no longer shift or brake after a half-hour ride, you know that the ergonomics need to change.
Seats
 Changing out the stock Velo Comfort seat is the only mod I recommend for all non-racing bike riders, men and women alike. Although the Aurora’s Velo seat is pretty darned good for what it is, it is a horned seat, immortalized as the standard since the first velocipede roamed the earth. Horned seats try to distribute body weight over as many square inches of stationary tissue as possible, which is a reasonable approach.
But not all tissues are designed to support weight, especially ones heavily laced with nerves. Sitting along the edge of a crossways 2×4 may not be too comfortable, but it’s do-able. Your butt may hurt, but it’s not a nerve conduit. Straddle the same edge between your legs, set all your weight down on it, and you’ll be counting the seconds. So the horned seat seems like the comfortable standard, but it, by design, puts pressure on tissues that are subject to damage over time. That’s why many riders who spend hours on end on their bikes, like urban police officers on bikes and e-bikes, shy away from them. It eventually causes off-duty problems at home, if you know what I mean. And even women are not immune to the nerve damage caused by horned seats, despite their remarkably different physiology.
Horned seats are not generally viewed as any sort of problem because of three issues. First, most horned seats are very comfortable! They are, and isn’t comfort proof of what obviously works best? Sure it is! …Well, at least until you ride enough to reach a point where it doesn’t feel so comfortable any more, and you push past it. Then you get the sensation that something down there is not right, and the numbness gives way to a constant urge to shove back on the seat to get away from the discomfort of that horn. So you angle the horn down, but find that the seat is now uncomfortable, and you keep sliding off the perch and down the angled horn. Then you start swapping to “better” seats, and keep swapping. But the issue only gets worse over time, once the placebo effect of each new seat wears off. A woman might notice that UTI frequency seems to correspond to bike rides. A man might notice a distinct uptick in ED, or increased difficulty in urinating. By that time, switching to a hornless seat is at best a hold, not a reversal. Any man is fairly likely to develop these problems later in life without once riding a bike, but the horned seat acts quite well as a catalyst. It accelerates an eventual probability into a current problem. At its worst, it brings a future forward that you never would have experienced without the “help” of the seat.
Second, the physical effects do take awhile to show up, and until recently the result has been hard to link to a bike seat as being the cause. It’s like exposure to low-level radioactivity, which took a big toll until the connection was finally made and publicized. The physical symptoms are temporary at first. Persist in the saddle, and the nerve damage may well become permanent. Unlike the muscle and lard in your butt, nerves do not regenerate much.
Third, machismo. Diehard cyclists are traditionalists above all things, and they consider bicycling to be a sport, not a hobby. Injuries are something to shake off and get over. The proof of manhood is to recover and get back on the bike. Bleeding scrapes are a badge of honor. They poo-poo any possibility that traditional seats might have a downside, and place performance above everything else. They discount any discussion of hornless seats with the suspicion that the proponent may be some sort of girlie-man trying to subvert The True Way of Adventurous Living. If you’re a male who’s really into ED and prostate-related problems, stick with what you’ve got, and put the miles on. Feel some numbness? Keep riding, pansy, you’ll get used to it! No pain, no gain! Be a man!
In truth, hornless seats are not offered because they are as comfortable as horned seats. They are not quite as comfortable (at least until there is enough nerve damage that horned seats become unrideable), most especially when you are seated fully upright. Because of that lack of horn, they do not feel as secure, either. Racers won’t touch them, but many long-distance and cross-continent riders swear by them. I recommend them because of my own many years of riding conventional seats. Had I known what was likely to actually occur to me in the long run, I would have switched over to hornless seats early, and shrugged off the lesser comfort and control as a matter of priorities. It’s easier to shrug off the downsides than it is to deal with the results of staying the course.
As for you? Only you know your seat time – how much time you spend on your bike. You are perfectly free to choose either way, and I’m not telling you what to do. I won’t cast any aspersions if you decide that a horned seat is best for you. But if you are more than an occasional rider, don’t say that nobody ever let you know what might happen.
Something to note in the seat descriptions below is that I proudly brag about attaining mileages which are ridiculously low by any measure for young, reasonably fit riders. While they’re cranking out 80-100 miles day after day, I’m waxing ecstatic about crossing 20 miles and then taking a day or two to recover. In the case of traditional horned seats, my damage is done and there’s no way for me to ever exceed the mileages I cite. Those can only decrease. If traditional seats were still all that existed, I’d be forced to give up riding, period. Hornless seats have literally made it possible for me to be able to take up bike riding once again, and it’s been a long time coming. For the hornless seats, the difference comes solely from my lack of physical conditioning. Spend enough years off the bike and taking it easy, and this is what you get when you finally climb back aboard. That conditioning will take considerable time to regain but, with a hornless seat, it can only improve because no factor is at work other than conditioning. So, look at my hornless mileage “ratings” relative to each other, not as the limits of what you can achieve. You can almost certainly do much better, right?
 Spiderflex seat. The Spiderflex seat supports what you are actually designed to place all your weight on, and nothing else. It is durable, is not affected by rain or sun exposure, and makes long-distance rides convenient even when you can no longer withstand two minutes on a traditional bike seat. A fully upright pedaling position is not the most comfortable for this seat, though. Like the Nexride below, it’s best suited for the usual mountain bike or road bike stances that take a little weight off the posterior. However, I recommend using one long before you’re forced to. The die spring inside its rear housing is too stiff for my taste, but does work to absorb some severe shocks. Though relatively expensive, it is top drawer and costs much less than the eventual medical appointments and prescriptions that won’t help. What determines your mileage limit on it becomes your butt rather than your naughty bits, which means that your seat time is limited solely by physical conditioning, and that’s adjustable. Being a lethargic, retired desk jockey, my petute’s in terrible shape, and yet I can do 20 miles on this seat. More consistent seat time should take mileage well beyond that.
 Nexride is a viable alternative, if a somewhat wonky one. The Nexride resembles a narrow padded brick turned sideways. Its wonkiness comes from the fact that it is free to rotate horizontally up to ten degrees each way around a vertical axis. This is a feature you don’t really appreciate – until you ride it and notice that pedaling does make your hips rotate fore-aft because of leg extension. That sudden freedom to move is almost startling, and makes you feel a bit like you’re doing the cha-cha as you pedal. It’s a great way to free up a stiff lower back. Does it work well as a platform for pedaling? Yes, it does. But it comes with a couple of caveats.
A fixed hornless seat loses some feeling of stability because of that lack of a projection between your thighs, while the rotating Nexride loses a lot more. On the good side, instantly dodging potholes or rocks becomes child’s play. It’s somehow easier to dance the tires aside and back without committing to a lean and weight shift as part of the mix. On the bad side, until you get fully used to it, the Nexride can create inadvertent, fine balance issues, since your center of gravity does not necessarily align with the point of rotation. Some people like it, while others don’t. The Nexride’s maker itself urges frequent, multiple rides to get used to it and fine-tune its adjustment, along with a 30-day return policy if it just doesn’t float your boat. The second caveat is that the rotation device is not self-centering. The seat can be in any position when you sit or rise and reseat yourself. That means you’ll be shifting your hips around to get the brick properly under your sit-bones every time you plant yourself on it. Then again, a centering spring might not be the boon I’d hope, since your sit-bones are not self-centering, either.
The Nexride’s Lycra covering does not shed water, so it will turn into a wet sponge in bad weather, and take some time to dry out. (UPDATE: Nexride has changed the Lycra to a textured vinyl-like cover for durability reasons. It’s waterproof and much better overall.) Like the Spiderflex, the Nexride is not that well-suited for a fully-upright pedaling position over longer distances. You can feel the difference in square inches. Still, my own limit on it is 23 miles so far, which is just a tad better than the Spiderflex. And like the Spiderflex, seat time is limited solely by physical conditioning, of which I have none. My wish: a little more width front-to-back. Caveats in mind, is the Nexride worth trying? I think yes, but do follow their advice about riding it long enough to acclimate yourself to its unique characteristics. I did not return mine, as I think it makes riding more fun, in a way. It also helps loosen up my perpetually tight back, but has not improved my dancing, which unfortunately is more of a basic motor skills issue.
 Serfas Rx seat. A more conventional option, and a decent one, is the Serfas Rx, a horned seat reshaped and padded such that pressure along its centerline is decreased. It is not nearly as effective in this regard as a hornless seat, but it’s in the ballpark, which is remarkable. Serfas RX seats actually come in many flavors, depending on your gender and riding position. I chose the wide Cruiser variation, and review that here. A great number of bike seats on the market have the shaped look of ergonomic seats, with a shallow divot down the central line. This is usually even worse than traditional seats, because these firmly-edged splits do not clear the nerves but now knife into them with two edges instead of a rounded platform. The central split in the Serfas Rx Cruiser model is not nearly wide enough either, since it is a gender-neutral seat, and the foam density aside the split is not soft enough. The other gender-specific lean-forward models are likely more effective here.
Serfas claims a total victory, but it’s more of a notable improvement. I can hack up to 8 miles on Evelo’s original Velo Comfort Seat while leaning forward (which is far better than most stock bike seats), and yet the Serfas Rx Cruiser doubles that while I’m fully upright and have even more weight planted on it. That’s not bad for a horned seat! Mind you, those mileages are maximums that require me to recover for a day or two before I can climb back on. However, I can use the Serfas Rx Cruiser repetitively on errands of up to 8 miles with no ill effects. Considering that I can’t even sit momentarily on most competitive-style saddles any more, that bodes well for your ability to rack up many, many more miles safely on the Rx.
So, if you’re not yet at the point where disaster has already struck, the Serfas Rx may be the seat for you. It’s a bit soft at the sit-bones, as serious seats go, but the plus side of this is that it absorbs rocky trails significantly better than the Spiderflex or NexSeat. Part of this is because the plastic platform that the padding rests on has holes molded in right where the sit-bones locate. The rear of this seat also rests on two rubber-clad posts (which they claim are elastomer springs) that rest on the main rails. Between the cutouts, those posts, and the rail flex, the result is a small but welcome give under impact. Unfortunately, the Rx is clad in Lycra and needs to be protected from rain, or you won’t be riding for a day or two afterward until it has dried out. Serfas offers a generous return policy, but given that it works quite well and is relatively inexpensive, I seriously doubt you’ll be using that.
Note that a loyal reader is using an Ergo The Seat as his posterior support platform, and vouches highly for it. I have not yet tried one, but it’s certainly worth a look and a try.
Handlebar-Related

Adjustable stem or no, the stock handlebar position leans me too far forward to do any serious road work.
The Aurora’s pedaling ergonomics are decent, and the stock position affords the average rider a reasonable balance of power, handling characteristics, and comfort for moderate rides. Thus, if you find that the standard positioning suits you for the distances you ride, do not change it. Again, do not change it unless you need to. Altering the handlebars or their positioning outside of what the stock adjustable stem provides will begin to introduce mechanical complications and handling side effects that you will have to deal with or accept as-is. So, this section deals largely with getting the Aurora reconfigured to adapt to my physical oddities and ailments that the stock positioning works against. As mentioned, I prefer a lean-forward position as opposed to an upright position, but I can no longer take any significant weight on my hands or wrists, most especially on a flat handlebar offering mediocre wrist angles. Oh, I can keep riding if I have to, but quickly become unable to work any of the controls, including the brakes.
So, I had to change the Aurora’s rider position, which is made more difficult by the fact that I am “long-waisted”, or have a longer than normal torso for my overall height. There are practical limits as to how high handlebars can be jacked up, so it can become as much a matter of handgrip positioning as much as simple height. Upward and rearward is the goal. I quickly found that handlebars that look like they will work may have very little effect at all on where your hands actually wind up, which is the actual goal here. Also, even as a normally-proportioned person, if you succeed in attaining a true upright rider position, the additional weight on the seat will affect your perception of comfort on it, and front tire traction will decrease. This latter trait stands out more on rough or loose surfaces, and can upset balance when crawling your way up a rocky trail. Upright pedaling also pretty much ends your ability to muscle your way up hills, as you would on an unpowered bicycle. You can’t yank on the bars for power if they are too high, so sport riding your Aurora will pretty much end. So consider carefully before you decide you “just like” cruisers better, and want to turn your Aurora into one. You may be better off choosing Evelo’s Luna model instead, if you don’t need wide tires or 500 watts of power for what you do.
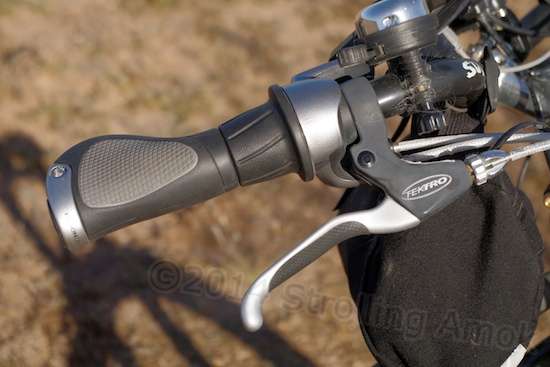 Ergon GP1 Twist Shift Grips. These are not necessary if playing with different handlebars has not bolloxed your stock clone grips. Mine were trashed in fitting the Nitto bar below, and I wasn’t hot on depending on friction fit on this shortened asymmetrical grip anyway. Despite what you may hear from Evelo, the $25 Ergon GP1 Twist Shift grips are not truly a direct replacement. At 3-1/4″ in length, they are quite short, but are made for shorter control collar systems than the Evelo uses. The grip length on the stock Aurora bar is about 6-3/4″ before the first mild bend. The unmodified Ergons plus the collars and brakes require 7-1/4″. That means you can stuff the Ergons onto the stock bar, but the brake handles will be located on a bend and most likely will kick a bit out of line with the grip. If you don’t mind that, it works fine.
Ergon grips jammed onto the stock Aurora handlebar. A technical success.
Ergons are held tight with a very simple but effective screw clamp at each outside end, so letting them hang off the end of the bar is not possible. Maybe there’s a usable bar extension I’m not aware of, but otherwise you’ll have to hack off what excess you have to in order to make the Ergons work on the great majority of handlebars. Since I had no handlebars that had the ergonomics I needed anyway, I decided to go on a quest to find cruiser-style bars with a grip length sufficient for both the Ergons and all of the Evelo’s grip area gizmos. That turned out to be quite an ordeal. But the Ergons are worth it to me. Properly adjusted per instructions, they will effectively minimize numb hands on long rides. Adjusted by intuition, they will offer little improvement. They hold fast, yet are very quickly removed for equipment service. I won’t do without them, ever, even on an upright cruiser. These can be ordered in Small or Large. Ergon advises: “The Small and Large label refers to how thick or thin the grip is. There is no difference in the length or ‘wing’ size between the Small and Large. The small grip is best for riders with small hands, those wearing thick padded gloves, and riders riding/racing technical mountain bike terrain. The large grip is best for riders with large hands, commuting, and city riding. We highly recommend visiting an Ergon dealer to get ‘hands on’ with the grip you are considering purchasing.” Mine are Small size, while my glove size is usually L or larger. I’ve used the large standard Ergon on another bike, but have found that I prefer the small.

The Delta stem extender is the black column with two bolts.
Delta Alloy Stem Raiser, black. A polished aluminum color one is here. With bicycle hardware having advanced nicely since I was last involved, the Delta Stem Raiser makes it possible to inexpensively raise existing handlebars up to 3.5 inches from stock. A “Pro” model (black) is also available that allows up to a 4.6″ lift, and substitutes a machined aluminum top cap in place of the plastic one. I should have gotten that one. This item is recommended by Evelo for this task and is very easy to install, using only a hex wrench. The complication is that you need to be careful to ensure that the bike’s exposed wire lengths will now be long enough to reach without any tension or stretching when the front wheel is turned 90 degrees or more. If not, more wire will need to be coaxed out of the frame by prying out the rubber gasket and carefully pulling more wire out. Evelo will provide you a link to a video showing you how to do this. I recommend a plastic screwdriver or other tool to avoid paint scratches and rust. You do not want any wires to be stretched by the steering action, particularly as might result from the bike accidentally falling over. It definitely does not pay to be lazy or careless when hoisting the handlebar up on a stem raiser.

The narrow Nitto bars are good for urban use, but don’t offer much real estate for add-ons, and don’t move the grips very much compared to stock.
Nitto Swept-Back B302 Alloy handlebar, 25.4mm dia x 485mm (19″) width. I have used this high-quality Evelo-recommended aluminum cruiser-style bar with very mixed feelings. On the positive side, it does slightly raise the grips and moves them a couple of inches rearward. On the negative side, the improvement isn’t all that much, and way too much of the bar is taken up by aggressive bends that go forward, leaving the handgrip areas way too short (at 5-1/2″) to accommodate the stock Evelo grips, collars and brake levers.

Not much grip left, is there?
The Aurora’s stock ergonomic mini-grips require significant trimming to even get close to packing on all those devices and, even then, the brake levers are on the bend and kick out of line with the grips. As with the Delta Stem Raiser above, you will want to ensure that the wires coming out of the frame are long enough to handle this Nitto bar. Both components together tend to induce enough bending on brake and shift cables to shorten their service lives, and the parallel-grip aiming of the Nitto bar is the main culprit here. My advice is to keep the Aurora’s stock handlebar if it remains comfortable for you. If not, keep reading.
 Wald #872 Cruiser steel handlebar. The 6″ grip length of this chrome Wald bar is not long enough to accept the stock grip, collars and brake handles. Aside from the grip butchery necessary, the $8 Wald bar is a humble but effective approach to lifting and moving back the grips, and cables are aimed inward a bit. The grip aiming is an improvement in wrist ergonomics over the Nitto bar, too. Just don’t expect real Ergon grips to pack on without some serious hacking. Rise is 3″ and width is 24″, besting the stock 1-1/2″ rise at 24-1/2″ width. Cautions about ensuring enough wire lengths apply here, too. As a precaution, use extra care in clamping it down, since this bar’s generous rearward reach can exert more force on the stem clamp than any other bar.

The Surly Open Bar doesn’t offer much lift, but the improvement in real estate and moving the grips rearward is commendable.
Surly Open Bar handlebar, 25.4mm dia x 40mm (1.5″) rise. The pseudo-rebel marketing hype for the Open Bar is more attitude than fact, but for the Aurora fitted with Ergon Twist Shifts, it works – just. Surly claims, “It’s got plenty of room for grips, shifters and brake levers”, but that pans out to an unspecified 7-1/4″ grip length – just enough to work and no more. I tried to get this length info directly from Surly before pulling the trigger on a $60 steel handlebar, but they couldn’t be bothered to reply to my un-gnarly email. I probably wouldn’t either, if I already had the nerve to charge that much for a de-chromed and painted Wald bar with a longer grip length.

Ow. The Surley’s clamp area swell is too gradual to allow remounting the twin- clamp display as-is. But applying a hacksaw results in a single-clamp mount that still works very well.
But it works, and its grip angles are good, stressing the brake cables only a little bit. Its 1-1/2″ rise is marginal, but its 666mm (26.2″) width is nice for control. The only non-pouty gripes that I have are that the pipe diameter at the grip is over spec, meaning that Ergon grips will go on only with a few paint-shaving grunts and some temporary lube away from the bar ends. Moreover, an elogated swelling at the central clamp area prevents the Evelo’s digital readout dual-clamp mount from straddling the clamp as it does on the stock bar. One leg on its mounting bracket must be sawn off to work. Fortunately, the remaining single mount holds just fine. For better or worse, “going cruiser” with an Aurora wearing un-hacked Ergons levels the handlebar options to one, the Surly Open Bar. Cautions about ensuring enough wire lengths apply. And as a precaution, use extra care in clamping it down, since this bar’s ample rearward reach can exert more force on the stem clamp than any other bar, save the Wald #872. From this point, there may be some fine-tuning on bar rotation, but that’s it.
 Dimension Threadless Stem – 60mm x 125 deg. x 25.4 Clamp (Silver). The Aurora comes with a decent adjustable handlebar stem that’s capable of putting the handlebar where it’s needed – except in my case. It is a long-reach stem, and holds the handlebar too far forward for comfort. It also demands more wire length than a short-reach stem, so jacking the bars up becomes more of an issue with it. So, I swapped in a short, high-lift Dimension stem in its place to get my upper body more upright. It doesn’t have much forward reach, and what reach it does have is cranked up nicely. Tons of Dimension-brand angle and reach variants are available to chose from, but be careful of keeping the 25.4mm clamp size intact in order to keep the stock handlebar usable. You won’t have to, but I wound up mounting this clamp backwards in order to get the last bit of upright pedaling position with the Surly Open Bar. That’s right, the handlebar clamp is now to the rear of the headset to move the bar rearward. This can trim back how tightly you can take a turn, due to knee interference, but it hasn’t proven a problem for me in use. It might for you. This stem may not need to be reversed with the Wald #872 bar, since its old-school styling moves the grips way back.
 Last and least is a pair of Giro padded fingerless cycling gloves to further insulate my hands from the effects of shock and weight. They help – not much – but they do make a slight difference, a side benefit being that they also shield the backs of my hands against the relentless sun. I do not provide a link, since these are best purchased at a store, where you can try them on.
Earthly Comforts

Good fenders can make all the difference in how a given day goes.
Planet Bike SpeedEZ ATB fenders. I put these under the “Comfort” heading because folks add fenders to avoid wearing whatever slop is on the ground. In my case, I use these specifically to avoid coating the e-bike with thrown salt and brine when I’m visiting the Bonneville Salt Flats in Utah. Salt is to electrical devices what kryptonite is to Superman. The SpeedEZ ATB fenders are one of the few that will fit the Evelo Aurora, and they are a snap to put on and take off, with no modifications or jury-rigging needed. Stretchy rubber straps hold them on, and they come with a plastic bracket that nicely secures the front half of the rear fender.
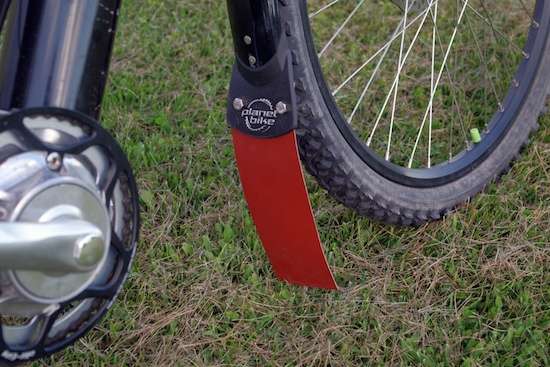 This bracket attaches to a frame crossmember on the Aurora, and can be left in place when the fenders aren’t being used. Made from a tough polycarbonate, these fenders are very light, yet do not rattle in place. They come with vestigial mudflaps, and I used hardware store rubber gasket material to fashion a mudflap extension of the front fender to better protect the Aurora’s motor as well as myself.

The fenders clamp on quickly, and hold much more securely than you’d guess by appearance.
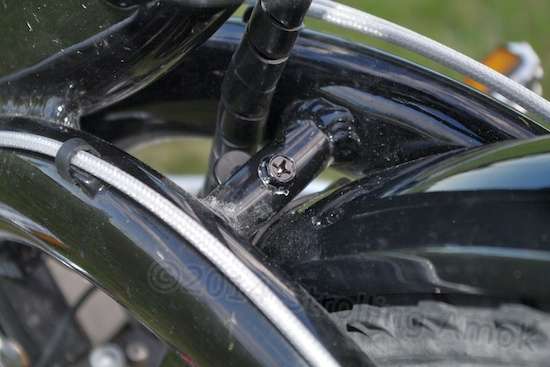
The rear fender slides into a plastic bracket that stays in place.

The forward end of the rear fender is left unsupported on the Aurora, yet offers no problems.
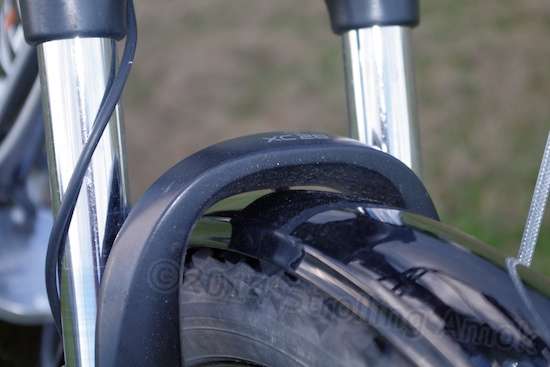
The front fender fits nicely under the slider brace, and even, as luck would have it, places a rubber button at the contact point.
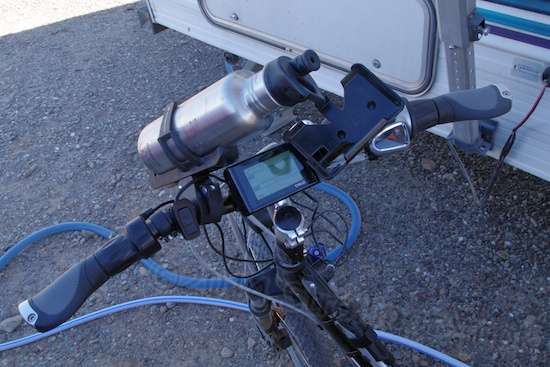
 Iris King water bottle cage. The Iris King water bottle cage, a hand-formed stainless steel affair, is an untrendy but elegant design that works superbly, especially with slightly oversize Kleen Kanteen water bottles (below). Bottles are easy to extract and remove, and holding security is very good. Imperious to UV rays and weather, these somewhat expensive pieces are a one-time-only purchase. Basically, it’s the last bottle cage you’ll ever need. They also happen to be just about the only cages that don’t require dismounting from the BOB Ibex bike trailer in order to transport it and the Evelo bike together on the Hollywood bike carrier. There’s only a few other similar clone cages I’m aware of, an aluminum cheap mass-production knock-off and an even cheaper one. Those may mark up your plastic bottle. There’s a Delta Inox stainless steel model, but I can’t vouch for its integrity. Your decision. King Designs being a one-man operation, I wouldn’t put off any someday purchase should he get sick of bending and welding steel. If retailers are out of stock (and they usually are), then ordering through his website will result in near-instant fabrication and shipment just for you, at what may or may not be a slightly higher price.
 Schwinn Expandable water bottle cage. These are inexpensive cages that I bought at a local Walmart. This model can be adjusted with a knob to vary holder width, allowing some pretty sizable convenience store water bottles to be held. Oddly, they can’t be adjusted to fit even the slightly oversize Kleen Kanteen bottles, which flop around inside like a drunken Weeble. So, they are special purpose cages for greatly oversize bottles only, and are useless for true bike bottles. For a while, I was using one to carry a can of Fix-A-Flat for Bikes. Now, it’s just unused, the other being replaced with an Iris King carrier. Their highly-stressed partially plastic design probably won’t last more than a couple of years in the sun, so the final changeover is inevitable.
 Problem Solvers water bottle cage mount. As the Aurora lacks any provision for mounting water bottles, this clamp is meant to allow mounting of a water bottle cage on the handlebars, and it does a fair job overall, even with the extra weight of an oversize 27-oz water bottle in place. Sheer physics intrudes though, and locating the clamp approaching bottle-horizontal is necessary to prevent violent vibrations from allowing a gradual rotational shift. Over-tightening can bend the clamp. It’s good, but not great for that large a bottle. Either mount size can fit the Evelo’s 25.4mm bar, and comes with thin pads that may work their way out, so choose according to how much rubber inner tube stuffing you intend to add, or toss a coin. The small one is here, and the large one, here. The small cinches with a common hex-head screw, while the large uses a thumbscrew.
 Swagman To-Go Bottle Cage. This plastic toggle clamp cage is an “Awww, too bad!” item, in that you want it to work, but it doesn’t cut the mustard in the long run for heavier bottles. It’s a well-known matter of relaxation of plastic over time and stress, called “creep”. You’ll need substantial rubber pads or an old inner tube to help the clamp get a better grip on your bar. I may gravitate to a different solution in the future as a result, but this is working for now, with care.
 Klean Kanteen water bottles. I’ve purchased plastic water bottles for years for biking around. For short-term rides on garaged bikes, they’re fine. For longer rides in heat or sun, they almost immediately impart a taste into the water that, depending on the exact resin used, ranges from unpleasant to nearly undrinkable. They also begin splitting after a year in the sun. Klean Kanteen leans heavily on Eco-guilt to market their ware, since one of these 18/8 food grade stainless steel bottles can replace thousands of plastic throwaways. Fine, but the real draw of these bottles is that they work. There’s no plastic lining sprayed inside, like in soda and beer cans, or aluminum bike bottles, either. Water tastes just the same as when you first poured it in, and stays that way for days. They last and last, even in full sun. I got four Klean Kanteen Stainless Steel Bottles with Loop Caps (threaded stoppers) for the trailer, and one Klean Kanteen Stainless Steel Bottle with Sport Cap (with a typical push-pull nipple). All of mine are the larger 27-ounce bottles with silver stainless finish, and smaller ones are available as well. The big difference here is that, because you can’t squeeze the water out of the valved cap as usual, special valving is fitted which allows flow. I expected problems pulling the water out, but it’s a gusher, yet neither the valve nor stopper gasket seep water when inverted. The “version 3.0” Sport Cap flows the best. They are promoted as leak-resistant, but not leak-proof. The offered alternative to the spout cap is a plain “loop” screw cap that easily unscrews and is leak-proof. All cap types use a silicone ring as a sealing gasket, and it works well. Both types of caps are interchangeable and are available separately for replacement. Yes, the pretty stainless bottle does surface scratch with use in metal cages, and careless handling can potentially dent it. Klean Kanteen also offers insulated (double wall) models that are reputed to work well. Just be sure that the size you’re considering has a 2.9″ diameter to fit a bottle cage. 12-20 oz seems fine. After considerable use, I see the Klean Kanteen as another one of those products that, like the Iris King bottle cage, is a no-regrets bargain. I will never go back to tasty plastic, if I can help it. It works that well.
The water bottles can be cleaned out with any sort of bottle brush you can find, or the Camelbak Bottle Brush Kit like I have, which includes a small brush for valves, drinking tubes, and the like.
Carrying Stuff
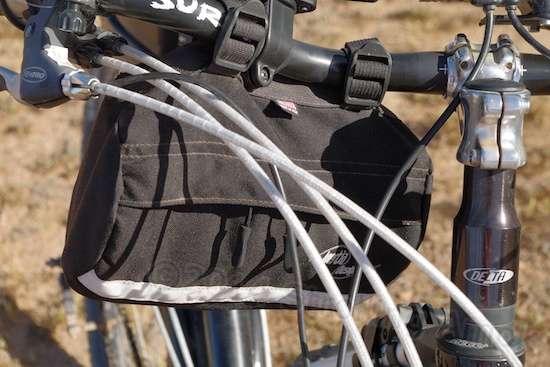 First off, an Inertia Designs Cruiser Handlebar Bag is an inexpensive and handy way to carry tools, a spare tube, and tire service items onboard. It is small but it is mighty, with a weather flap over the zipper. This is one of those bags that you don’t think will carry much – until you start heaving stuff into it. I did initially carry it on the handlebars, but reversing the stem made this an awkward place. I then mounted it to the Ibex trailer’s mounting fork, but I wasn’t happy with that since it needs to stay with the bike at all times, not the trailer. The Aurora’s frame design puts usable space at a premium. I’ve since mounted it on one side of the Surly handlebar, and it seems to work okay there.

The Topeak MTX rack “A-Type” is the only model that stands much of a chance of clearing both the battery and the seat hardware.
Topeak QR Beam Rack MTX Bicycle Rack. This is a highly adaptable light-duty rear rack that quickly clamps onto the bike’s seat post, and that’s it. Topeak makes integral bags and baskets for it that slide and clip into place, and a few bucks more will get you a pannier attachment that allows you to hang saddlebags without fear of fouling the bike’s wheel spokes. The Aurora’s battery can be charged in place, but should you need to remove it for recharging, the Topeak rack must be removed or at least swung well out of the way first. The good news is that the Topeak’s quick-release clamp lets go in a few seconds, so this is no ordeal. The clamp is rubber-lined, and you can select from the rubber spacers to properly fit it to your particular seat post diameter. If there’s any bad news, it’s that the MTX is rated at 20 pounds load, and if its clamp is not cinched up firmly, it can slowly work its way slightly off to one side as you ride loaded. This swing and the rack’s load limit can easily be improved by fabricating a resting pad that attaches to the Samsung battery’s original rear rack mount. I simply haven’t done it because of a lack of need. Note that the linked Amazon item shows pannier supports which are not included with the rack.
 For my purposes, I quickly became unhappy with the cheap steel clamp-arm rack that’s built into the Aurora’s Samsung battery, and removed it. It’s okay for around-town miscellany, but it’s in over its head for serious work, which is another way of saying that it won’t stand abuse. Trouble is, the bike’s big battery takes up all the space needed to mount a standard rack, and the seat post mounted Topeak MTX is the only solution I found. Topeak offers several different models for different bike frame sizes, and the “A-Type” is the only one which will fit the Aurora. Forget the “extra small and small” frame guidelines this rack is recommended for, because despite the Aurora’s large 20″ frame rating, no other MTX model will clear the battery. Although the MTX’s clamp is just 2″ tall, I recommend a minimum of 2.5″ of exposed seat post to keep the rear of the rack clear of the battery. That translates to about a 31″ clothing inseam, or greater. Even at the that, the original Samsung rack must be removed to provide clearance. If you’re a real shorty, and the post isn’t showing at least 2.5″ exposed, this rack won’t work for you, and I have no alternatives. Should you install it and find that its upturned stalk interferes with the rear of your seat hardware, do what I did and replace the seat post with one that moves the seat forward a bit (noted below). This will probably not be an issue if you have substantially more than 2.5″ of exposed seat post.
 Please note that all this dancing around to measure the exposed seat post and maybe compare yourself to my inseam assumes that you are adjusting seat height correctly, ergonomically speaking. Too low, and not only won’t the rack wedge in, but you risk blowing out your knees while pedaling. Lots of people adjust the seat so that they can nearly flat-foot the ground while standing still. This is convenient, but bad. It not only stresses joints, but it takes more energy to pedal. If you think that bicycling is too much work, then it is, and this is probably the reason. Too high, and you’re nearly unable to reach the ground on tippy-toe, and you’ll be rotating your hips side-to-side while you pedal. That’s not good either.
Here’s how to do a basic adjust: Keeping your hips level, place the arch of your foot on the pedal when it’s at the very bottom of its stroke. Adjust the seat height so that your knee is just barely broken from a straight leg. When you place the ball of your foot at pedal center, you’ll notice that you can both easily reach the pedal, and bend your knee a little more. This allows power to come from both your thigh and calf muscles, and with maximum leverage. Straight leg – not good. Almost straight leg – good. Now double-check while riding, just to make sure your hips are staying level while you pedal, and you’re not straining to reach them. If your pedaling is correct, then when you are at a standstill, needing to tip the bike to one side or having to slip forward off the seat is second priority, not first. If push comes to shove, your knees are more important than your convenience. The Aurora’s quick-release seat post clamp makes this adjustment so easy that there’s no excuse for not final-checking, just to make sure the height is right. You are the prime power source, even on an e-bike, so proper seat adjustment makes a big difference.
 Topeak MTX wire basket. This coated wire basket is sturdy and of high quality, a well thought-out design that surprises by fully living up to its claimed features. The basket slides into place on the MTX rack (only) with a tongue and groove system, and is held positively and released easily with a large and well-located pushbutton lock. Its carry handle works very well, easily tucking itself out of the way. I had originally thought that this basket could disengage from the rack with an unbalanced load over a violent bump, but the much more likely explanation is that I had been careless in engaging the tongue & groove slide features together. It’s pretty stout, and has proven handy as all get out. A Trolley Tote folding basket is also available, should you prefer, and various Topeak MTX bags are also an option.
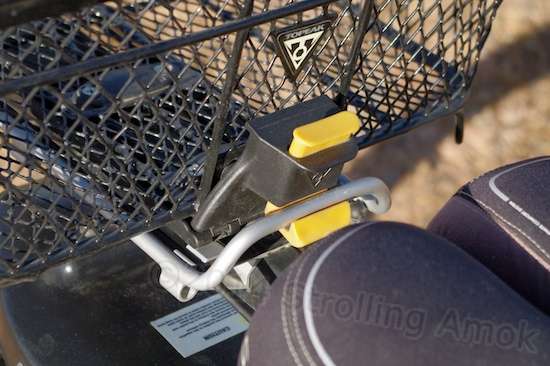
 Race Face 27.2mm Ride seat post. This change was necessary since the Spiderflex seat support hardware interfered with the Topeak beam rack at my needed seat height. Its also handy simply to move you forward enough to clear a rear basket. The seat can be slid forward on the stock seat post, but is better used with a seat post which clamps the seat along the post’s centerline rather than a clamp that hangs off to the rear. There are limits as to what seat hardware can safely deal with, as far as leverage goes. Any new post will require cutting to length in order to be usable in the Aurora’s curved seat tube. This is one of those components that you tend to ignore until some kind of clearance or rider positioning problem crops up. Will you need a new seat post? You’ll find out when you clamp on the Topeak rack and basket.
Power Delivery

The new 44T chainring and guard.
The 500-watt version of the Aurora needs no help in normal launching and low-speed riding. I only recommend a front sprocket change if additional low-speed leverage is needed when the going gets especially tough, particularly with a loaded trailer attached. The stock sprocket has 48 teeth, and a swap to 44 is the smallest I recommend for all-around utility duty. An All-City Cross Ring 44-tooth x 110mm chainring or front sprocket and matching chainring guard, is what I had installed, though just about any brand 44T, 110mm bolt circle chainring and guard will do as well, at least with the NuVinci residing at the other end of the chain. I’d prefer to reuse the stock chainring guard rather than install the new 44T one, since its larger size protects pants cuffs better than the smaller guard does. That is not to be, however, since the bolt circle size is not shared between the two.
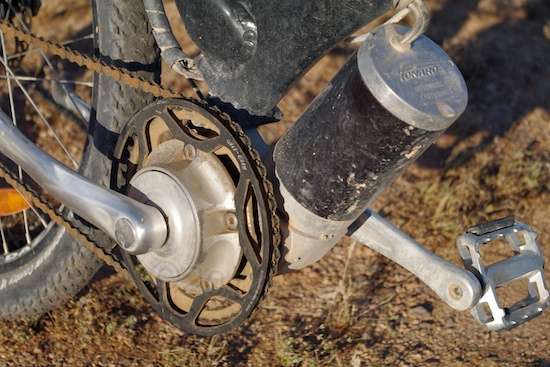
Ugh! The chainring as it is today, and every day.
In my application, I see it as a worthwhile investment, and an investment it is, not only for the sprocket and protective sprocket shield, but for the labor to install it. Without proper tools, experience and fortitude, it is a task best left to a shop with some mid-drive experience. My shop, a highly-experienced upscale bike shop, was stumped by the Evelo’s ratchet drive, and required a walk-through with Evelo by phone. I was told that the All-City sprocket needed some minor trimming to fit. After a lot of stops and starts, some three hours later, it was back together and working. The result is noticeably better rough trail and uphill climbing ability, particularly when the battery is on its last half of its power capacity. Evelo has mentioned to me that sprockets below 44 teeth may require that the chain be shortened, since the NuVinci’s automatic chain tensioner has only so much range that it can handle.
But note that this modification is a trade-off. The regulated stock 20MPH top speed is slightly affected. It can still reach 20, but is more easily deterred from it by wind or grade. It’s not a lack of motor power per se – it’s the fact that the motor’s maximum torque is not developed at top RPM. The smaller sprocket makes the motor pretty well wound out at 20. The Aurora’s 24-25 MPH reprogrammable limit is moot with this setup, since I haven’t gotten it over 21 on the flats. Then again, it no longer chops power off at 20 when pedaling downhill, which is nice. The NuVinci’s full ratio range is pretty good compared to a common derailleur bike, but has no equivalent of a mountain bike’s wide-range granny gear, which is an often-debatable advantage.
You can use an even smaller 36T, 38T, 39T, or 42T chainring and guard if you want the Aurora to climb like a mountain goat, but top speed will definitely take a hit, and you may run into both traction issues and an inability to maintain balance and control at the very low speeds where the extra torque actually comes into play. For you half-crazed gearheads, using the 44T chainring, maximum speed in the NuVinci’s lowest gear approaches 8 MPH, but maximum motor torque is not available there. It seems to live closer to 4 MPH and below. (Electric motors produce max torque at stall: zero RPM.) How’s your balance at 4 MPH on a rough trail? Holding to a tight path at 3-4 MPH while picking your way up a steep and rocky trail is all-or-nothing: plant a foot on the ground to keep your balance when the front tire repels off a rock, and the sudden decrease in weight on the seat will likely cause wheelspin and a stall. If the momentum is not available to keep you balanced strictly on the seat and pedals, more available torque at the rear wheel may not be the boon you imagine on loose surfaces, since that extra grunt is only available at duckwalking speeds that take your weight off the seat. In my experience, the 44T is the best available compromise with the NuVinci’s range of ratios, and even this mod should not be done unless you need it. Find out how the stock 48T chainring does for you first. The 44’s true forte is launching uphill on pavement, with a trailer in tow – not off-roading solo. I suppose the 44T might be of more use with the stock 250-watt motor while on good surfaces, but the more effective approach is simply more available motor torque.
I made this mod without the benefit of being able to first test how the stock chainring performed in my various locales out west, since having the work done by some bike shop while on the road just wasn’t going to be possible. Tiny rural towns out west don’t have bicycles, let alone serious bike shops. So, I located and climbed the only challenging hill near my campsite in Illinois, and made an executive decision. It turned out to be a good one, but the caution about max power coming on at very low speeds still applies. Once you’re going slow enough to have to tap a foot for balance while climbing on rough ground, you’re done for the day on that particular grade no matter what chainring you have. The momentum provided by speed is far more valuable. The smaller chainring is a benefit only if you have enough tire traction to use it. For me, that 44T chainring comes into play only when towing loads on either pavement or packed dirt where getting up momentum for a charge is not possible. Justifying the cost while running solo becomes more of a choice between stalling the motor and stopping, or losing traction and stopping. Either way, you’re done at about the same point, and your wallet will determine the style in which you come to a halt.
Puncture Resistance
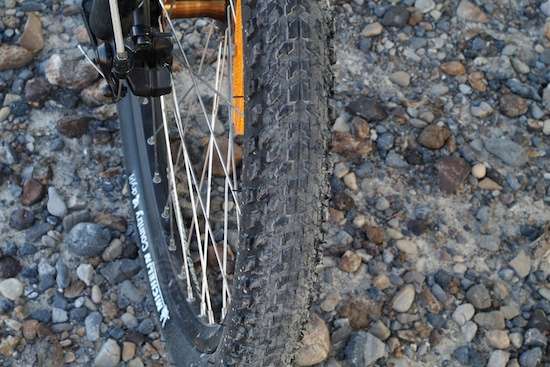 Michelin Country Dry [2] 26″ x 2.0″ tires are what I currently have mounted, and they are working very well so far. I quickly gave away the Aurora’s original Kenda Kwick tires and tubes, since they were noisy and inappropriate for the terrain types I encounter, and even pavement grip wasn’t all that great. The Kenda’s tread is very thin, which decreases rolling resistance, but I just couldn’t envision them as lasting for very long in frequent use. Tires are a bit like shoes – there is no “best” shoe, only the one which you feel works well for you. The Michelin tires are quieter and are good for pavement, dry dirt, and shallow gravel and sand. Not so good for thick mud, large gravel, or very deep sand. Fire roads and pavement are their forte. Although they too follow the current trend of shallow tread depth for less resistance, they at least do better than peppering a bald tire carcass with bumps and calling it a durable tread.
Flat tires are not that much fun out on the road, especially out West, where goathead thorns pose an everyday problem in the boonies. There are two approaches to take here. The first is preventative: select tires incorporating puncture-resistant belts in the tread area, or to buy an add-on puncture-resistant liner and slip it between the tire and the tube. The other approach is to minimize the aftermath of tire penetration: buy thick “thorn-resistant” tubes, or tubes with self-sealing goo inside them, or both. These are hand-wringing decisions for a lightweight bike because of added rolling resistance and rotating weight, but not so much for an e-bike, which already weighs a ton and has power to spare. The fewer flats you get where you ride, the less robust an approach you need to take.
When it comes to punctures out West, I believe that redundancy is a good thing. Belt and suspenders. That’s why I’ve fitted both Mr. Tuffy Ultra-Light Anti-Flat Tire Liners, and Michelin ProTek Max Tubes using Schrader valves that can be re-aired just about anywhere. The tire liners need to be chosen in a size appropriate for your tire (my 2.0-wide tire uses the Brown liner), and will provide an effective barrier to thorns and the like. The Michelin ProTek Max tubes have a peculiar knobbed wall design that claims to pinch off punctures, plus they contain a sealant. This combination works well.
 Just to avoid the potential for frictional wear between the tire, liner and tube, I shook in some Rema Tire Talc to eliminate the issue. Lots of people simply use corn starch instead, which also works well. I recommend you use something though, because low-pressure tires do flex and squirm, and the added belt in particular overlaps itself. A bike tire that’s running low on air will want to creep around the rim and eventually rip off the inner tube’s stem, so giving the tire and belt less of a grip on the tube can be a good thing.
Another, earlier approach that has proven very effective for me is to fit Slime Thorn-Resistant Extra-Thick Smart Tubes. This is the old-school approach. The Extra-Thick Smart Tubes not only work, but hold air for much longer periods than standard tubes. I had also previously found the standard-thickness Slime tubes to be ineffective, but I had no puncture issues at all with these thick-wall ones. Install and forget. They’ll hold air for months. The modern approach of pricey armor-belted tires or add-on tire liners with Michelin ProTek Max tubes has the benefit of much less rotating weight than the exceptionally heavy Slime Smart tubes. I’m not at all adverse to armor-belted tires, but have not yet found one with the off-pavement tread orientation I need. The Slime sealer itself has the potential to gum up the tire valve, but since the stuff is water soluble, removal and cleaning with a wet Q-Tip can clear it. Their only issue on the Aurora is that their short stems barely clear the new-style double-wall deep rims, but they are usable as-is. Slime also offers Slime Valve Extenders if you are having valve access issues, as well as small 8 oz bottles of Slime Sealant that you can add to standard tubes. In standard tubes, my results with it have been mixed: better than nothing, but not much.
If you decide to add the sealant to your existing tubes, I strongly recommend that you go ahead and split the 8 ounce bottle between two bike tubes, but otherwise disregard the instructions, which will fail to distribute the sealant properly. Simply adding sealant to an installed tube and rotating the wheel will not put sealant far enough away from centerline to give full protection. I learned that the hard way. I recommend that you add only enough air to the bare, exposed tube (dismount it) to take it out of the flat, rolled & boxed shipping condition it began in. Remove the valve, add the sealant, and replace the valve. Now squeeze and squish the tube like a tube of toothpaste, working the sealant over the entire inner surface. Add a little more air if you need to, install the tube inside the rim and tire, and air it up.
 Topeak Road Morph G Frame Pump. A new or previously unhappy tube will need air. Many, many pump types exist, from foot-operated to hand pumped to CO2 canisters. After considerable hand wringing, I chose the Road Morph G because it includes a built-in gauge and a fold down “foot” that allows it to be stepped on and used much like a small hand-operated floor pump. I’m no spring chicken, and after a day in the heat and wind, I didn’t feel I could count on yanking and pushing an air cylinder on arm strength alone. I’m a huge believer in using body weight in place of strength. The Road G includes a decent integral hose and a good frame mount with cable ties long enough to wrap around the Aurora’s extra-tubby down tube. The pump is held to the mount with a simple Velco strap, so access is quick. It comes set up for Presta valves, but removing the tip cap and reversing the rubber seal inside sets it up for Schrader valves.
Having a 2-inch wide mountain bike tires, I also considered the very similar Mountain Turbo Morph Frame Pump, which has a larger barrel to pump more air per push, but I’ve found that the G is perfectly adequate for me. If I were in a competitive run and got a flat tire, I would presumably also have the suds to shove the Turbo’s larger cylinder for a quicker fill. Well, I don’t want to take all day, but a flat on a deserted road is not a race. The Road G’s fill rate is pretty good, and there’s no monkey business with using it. Given enough time and cursing of course, it can very easily generate enough pressure to blow the Michelins clean off their rims. The gauge is surprisingly accurate for a pump of this type and price, though it is intended to get you back in the ballgame rather than fine-tune in 1/2-PSI adjustments. You pump a little too much, and grab your precision gauge if you want to bleed air down to an exact pressure. The Road Morph G works, and works well. At its price, it’s a clever steal.
Finding My Way
GPS
 I’ve added a RAM GPS mount, but am not including a link here because such mounts are so model-specific. My handlebar mount for the Garmin Nuvi 4.3″ family of GPS units holds solidly. Limited to a single clamp screw, it “must” be mounted to the handlebar from one end, and requires gasketing to take up any sizing difference slack. I say must because I don’t think the clamp can open over the bar diameter without breaking. Although the GPS mount is adjustable for rotational angle relative to the bar direction, the GPS will remain facing perpendicularly from the bar section it’s mounted to. There is no ball swivel. So, the bars you choose and where you mount it can make a big difference.
 The Nitto bars are not the best choice for this, their narrowness and severe bends causing a cramping together of competing components. The wide Surly Open Bar is more accommodating. I have since that time found more appropriate swivel GPS mounts, now that I have more research time available. The Nuvi’s display itself tends to wash out in such an exposed situation, and is of limited value except where it’s absolutely required to pick paths through to the destination. An iPhone or similar device seems to be the better, brighter choice for “normal” use, though not without eating cellular data. The Garmin’s advantage in the boonies tends to be better coverage of and labeling of dirt roads and trails.
 A Startech USB2HABM1 1-foot USB2.0 A to MiniB cable links most Garmin GPS units to the Aurora’s display charging port, making it possible to extend its use far past the onboard battery’s time limitations. The display’s port must be manually activated with the controller to turn charging power on. Your own GPS may have a different USB port than a MiniB, requiring a different cable. The Aurora digital display’s port is the standard A-type.
Lighting
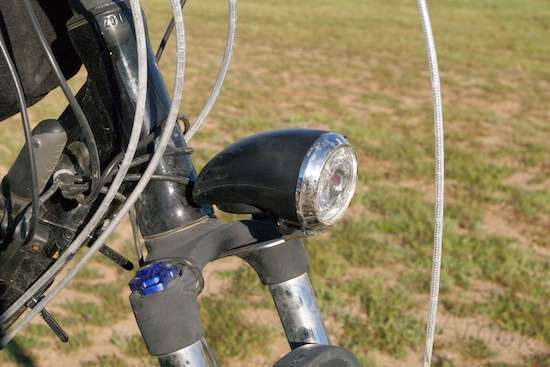
Short, sweet, and steel.
My mod to lighting is not a purchase thing, it’s an overcome-the-problem thing. The original headlamp mount is a bracket which attaches to another two-piece bracket that holds the fender. I never cared for the Evelo’s two-piece vestigial front fender, since it is much more of a styling device than an effective protection device. To me, it looks ridiculous, and when the rearmost section decided to part the ways while I was barreling down a highway with the Evelo carried on the front of the truck, I took it as a recognition of my disdain. Off came the remaining front section of fender with its own bracket, and I simply kept the headlamp and its bracket mounted to the bare forward fender bracket. The lamp wobbled with every bump just as it had before, and eventually, the aluminum front fender bracket snapped from fatigue on a rocky trail. Aluminum has very limited fatigue resistance.
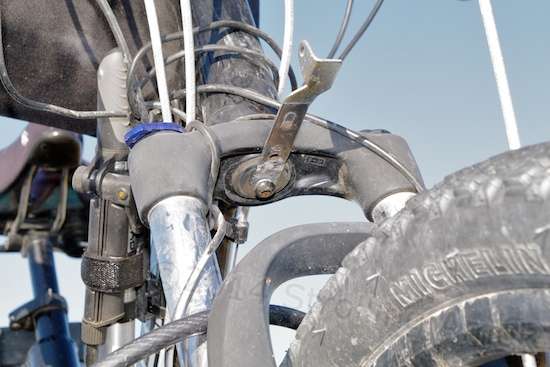
The flattened headlight bracket.
Fortunately, I found that if the upturn at the rear of the headlamp bracket was flattened out, the straightened bracket would be able to mount directly to the single mounting screw on the fork. The only problem was that this mounting screw disappeared into a cavernous hole, which would give the bracket no support. A large fender washer from the hardware store fit nicely over this hole, and created a solid platform for the headlamp bracket to hold fast to. Result: a wobble-free headlamp, and a mounting system that will not fatigue and snap any time this century. Side benefit: the washer now keeps wet tire splash and dust from getting at the lower headset bearing, which the OEM fender brackets do not do.

Headlight mounted on the original forward fender bracket half. Like the fender, it wobbled. Then it snapped from fatigue.
Weatherproofing

Gently pry out the gasket to be able to GENTLY pull more wire lengths out.
Since I was yanking extra wire out of the frame anyway because of the raised handlebar, I decided to try to improve the in-frame wiring’s resistance to condensation and water leaks through the gasketed wire entry on the down tube. The small computer-style connectors inside the frame are fully open to whatever’s in there, so I pulled out and tightly wrapped each of several connectors with quality 3M weather-resistant electrical tape. One connector remained trapped inside, and could not be wrapped. I’m just not into yanking extremely thin wires.
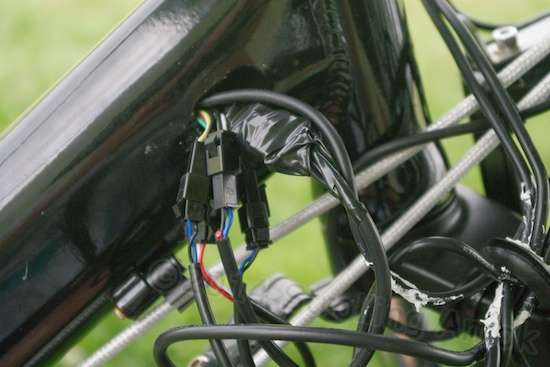
I pulled out all the electrical connectors I could, and taped them.
On the outside, white RV roof sealant is an option, but I chose instead to make the wires drop down once outside, and wrap them up to the gasket with tape too, the theory being that any rain leaks will run away from the gasket and drop off the hanging wires rather than be funneled into the gasket’s central opening. It’s a “we’ll see” mod. I’m just lucky my Aurora spends the great majority of its time in arid conditions, otherwise I could see some real issues with cold mornings and condensation inside the frame tubes. Those internal connectors are not designed to deal with that, but marine or automotive-quality connectors would be both horrifyingly expensive and overkill on the vast majority of Evelos. To boast that “Well, it’s $100 more because we have MIL-Spec weatherproof connectors stuffed inside the frame,” is not much of a sales point to most buyers.
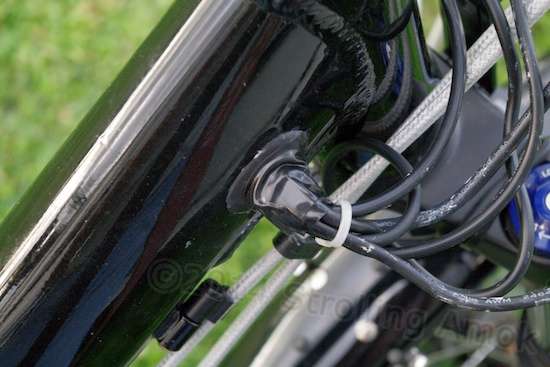
The rubber gasket works well, but though I could goop the entry with sealant, I decided to tape it and bend all wires down to discourage water from seeping in.
Condensation, humidity and corrosion inside the frame tubes is the big unknown here. The frame can take care of itself, and so can the insulated wires. The issue is wherever the insulation isn’t, like connectors. Sometimes, it’s better to ventilate such things than to seal them off. My Aurora spends 3/4 of each year in arid climates, which will help. Ultimately, I taped off the wire entry point mainly since that side of the bike faces forward during transport on the road. No point in literally driving rain into the frame.
Heavy Hauling
You’ll find this to be an oddball section, because I have deliberately pressed a single-wheel trailer into service with my Aurora instead of using a dual-wheel trailer more common in around-town use. A single-wheel trailer has certain advantages in cross-country and off-road work, but also imposes structural demands on the bike’s frame. You may not need a bike trailer, but if you do, you may not need a single-wheel trailer. The 500-watt Evelo Aurora is superbly suited for dual-wheel trailers, and will work well with single-wheelers – up to a point. Thus, all that follows in this section is a detailed look at using the Aurora with just that one type of bike trailer. The various issues that I tediously point out do not apply to any other trailer design.
The Beast of Burden
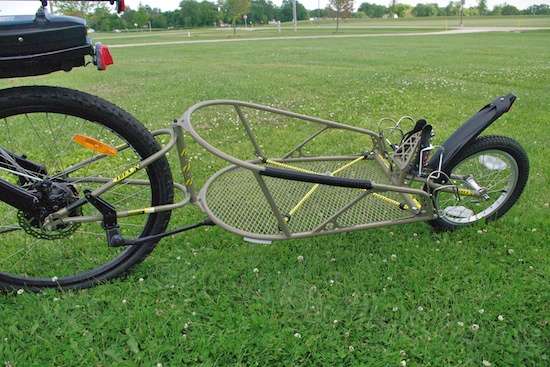
The B.O.B. trailer as-purchased is suitable only for hauling volleyballs. You need to B.Y.O.B., or bring your own bag or bucket to make it suited to what you want to do.
A B.O.B. (Beast of Burden) single-wheel trailer has made a big difference in expanding cargo capability. These trailers attach to the bike’s rear axle, and are considered the standard for serious cross-country travel. During the Trans-American Electric Bike Tour (described below), a B.O.B. Yak was used behind an Evelo Aurora, while a Burley Nomad was towed behind an Evelo Aries. Attachment to and removal from the bike takes just a brief moment and is done without tools, and the result is a trailer that tilts with the bike on turns. The big advantage for bad roads and no roads is that the single wheel tracks directly behind the bike’s own tires, so there’s no concern about catching a wheel on a rock, curb or pothole and jarring the load or flipping the cart over. With a working load limit rated at 70 pounds and a weight of just 20 pounds, I’ve loaded my B.O.B. Ibex with 100 pounds of groceries, and it stays stiff.
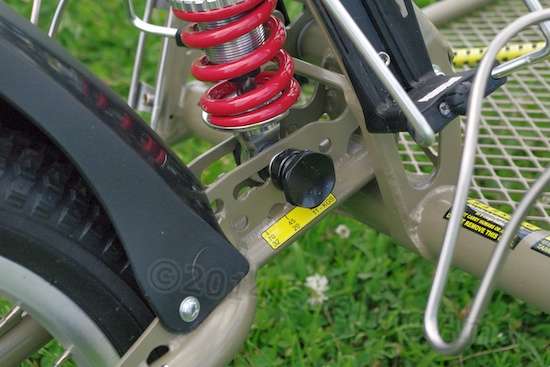
The spring is adjustable in leverage, though you give up a little suspension travel for a stronger setting.
B.O.B. trailers come in two models, the Yak and the Ibex. The Yak is much more popular, being a simpler and less expensive rigid trailer. It is the universal choice for cross-country travel on both paved and dirt roads. Its rear fender is full-coverage, making wet weather use practical. The Ibex model adds an adjustable suspension for its single rear wheel, which can somewhat cushion the ride on bad pavement and bad trails. I say “somewhat” because only the rear of the trailer is suspended, not the front, and it doesn’t matter if your bike has a rear suspension or not, since the trailer’s front fork attaches to the bike’s rear axle, not its suspended frame. “Somewhat” also applies to the trailer’s rear suspension itself, since B.O.B. recommends rather stiff spring settings to prevent bottoming out the suspension, which could damage the short “shock absorber”. It’s good advice if you’re going to pound the bejabbers out of it on curbs or rocky trails. I know where I ride though, pick my path carefully, and have yet to move the setting off “0-25 lbs”. Its maximum 3.5″ of travel is more than enough for just about everything, and ground clearance of the frame itself is commendable. The Ibex’s rear fender is more stylish than practical, and retrofitting the Yak’s fender to it is not possible unless the Ibex’s tire has been swapped for the narrower Yak tire.
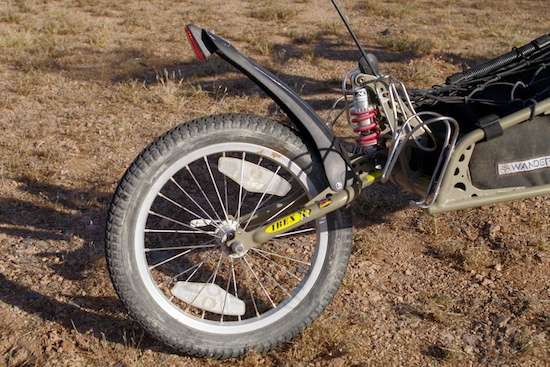
The Ibex’s fatter 16″ tire is well-spoked and stiff for off-road use. That fender does NOT stop all spray or grit from flinging ahead into the basket, though.
If there is any weak point in either model, it’s the tire. As far as I can find, no one makes a really heavy duty 16″ tire, and at the maximum 35 PSI, its ability to survive rough abuse under a full load is limited. Thus the Ibex’s suspension can potentially help it survive a deep, sharp pothole, where the Yak would smack the trailer’s full weight and inertia onto that one contact point. If there’s any good news in this, it’s that both models use a quick-change axle, making tire and tube access instantaneous, without needing to dig out a wrench. At full load, this setup decreases the need to carry a spare wheel, something which B.O.B. advises as a good idea for true cross-country touring with the Yak and Ibex. Not applicable for me, though. I hope.
Add-ons

The Ibex adds two additional bottle cage mounts on its suspension tower, for those who prefer their martinis shaken, not stirred.
Designed for cross-country use, both models also include multiple water bottle cage mounts. The Yak has two, one at each rear frame corner. The Ibex adds two more on each side of the shock mount arm. This might seem like overkill until you realize that some bike accessories, like frame air pumps, often include holding brackets that fit these same mounts.
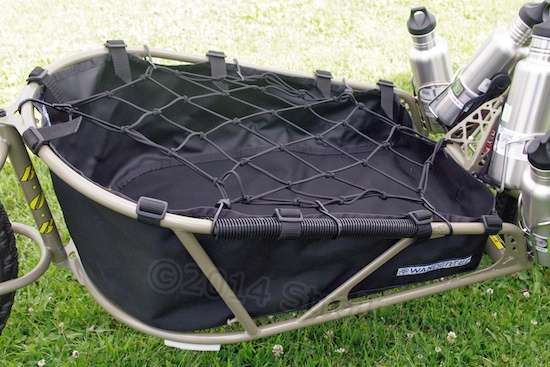
Both liner and net are very high quality and very durable, even in full weather exposure. The net can stretch quite a bit!
B.O.B. trailers use an open-frame construction with an expanded steel bottom, so some type of cargo containment is usually needed. B.O.B. offers a “Dry Sak“, which is a large waterproof duffel bag. Invaluable for cross-country travel, it’s impractical for general toting purposes, such as grocery runs. Many users have found lidded plastic storage bins to do the job. In dry weather areas or usage, the Wandertec SAX-BOB woven nylon cargo liner is an excellent solution as well. It takes a couple of minutes to strap into place or remove, but it is a quality, heavy-duty item that works very well and uses every inch of the trailer’s available space. I topped mine with a Wandertec cargo net, kind of an elastic fishnet with hooks all around the perimeter. It just can’t be beat for holding down a multitude of loose items. I also stow a couple of 24″ elastic bungee straps for the oddball cartons and larger items.

The Greenfield kickstand stays out of the way when up.
One other add-on that I consider invaluable is the Greenfield Stabilizer Kickstand, a long-reach stand that clamps neatly onto the trailer’s front fork. The Aurora’s high center of gravity is often a problem when parked on uneven ground or in wind, and the loaded trailer simply adds to the problem. By any measure, the Greenfield kickstand is a triumph, mounting right where it needs to be and reaching out far enough from the combo to stabilize the whole rig. It has no negatives or compromises that I’ve found in constant use.

Look at that reach! There’s practically no need to “test” for level or firm ground when parking, even in a wind.
Though it’s a universal kickstand, it bolts right up to the trailer’s front fork, and its leg length is perfect as-is. When my Aurora is on the road solo, I actually miss having the trailer’s Greenfield available. It works that well. Replacement rubber feet are available as needed, since some loading conditions will eventually urge the aluminum stalk to punch through the bottom of the rubber foot. As an aside, it is impractical to load the trailer and then try to hitch it to the bike. Hitch up first, and then load. It’s a shame that it can’t be clamped directly to the Aurora’s wheelstays, for solo use.
I also swapped in a 16″ Kenda Extra-Thick Thorn-Resistant Tube on the Ibex’s tire. It’s actually a little small for a 2.125″ tire, but has shown no problems so far. Goathead thorns abound where I go, and my bike has gotten flats, but never the trailer. I suspect this has to do with the bike’s tires picking them up before they can get to the trailer’s tire. I suppose that’s almost good, since it avoids having to try to get exotic with puncture protection on a 16″ tire. Time will tell. I do carry a spare tube, but it is currently the standard tube that came with the trailer. Emergency only, because it won’t last long out here.
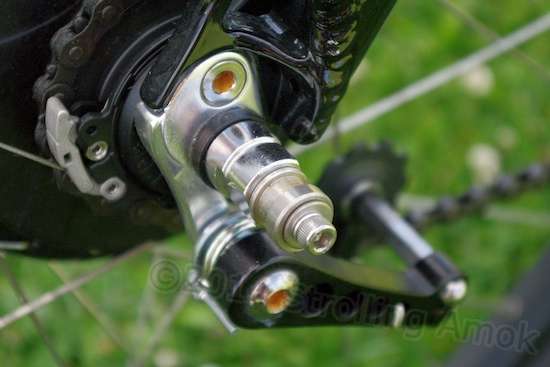
“10 x 1 B.O.B.’s Nutz” is a rotating bearing to adapt the Nuvinci hub to accept the trailer’s mounting fork.
Each model of trailer includes a pivoting front fork that attaches it to the bike’s rear axle, and includes a quick-change skewer that replaces the bike’s original. Evelo bikes equipped with the NuVinci 360 stepless gearhub use common threaded nuts instead, and B.O.B. offers “10×1 Bob’s Nutz” to replace them. On both the Yak and Ibex forks, the standard front fork will fit the 26″ Aries and Aurora, and by appearance may just clear the Luna’s rear fender mudflap. Forks are not interchangeable between the two models. In general though, I recommend the Yak and Ibex with the so-called longer “28 fork” if you’re going to add rear fenders to the Aries or Aurora, or if you have the Orion, with its 700c tires and fenders. The issue tends not to be the fenders so much as the protruding mud flaps. Some clear the standard fork, and some don’t.

Oops. The SpeedEZ ATB fender flap rides firmly against the Ibex’s fork assembly. You can live with it, remove the flap, or replace the fork with a longer one.
The SpeedEZ ATB fenders I use do not clear the standard fork, and unless I was willing to remove the mudflap, I had to swap in the longer-reach Ibex “28 fork”, which can be included as part of the initial trailer configuration and is also available separately for about $60. It is not interchangeable with a Yak “28” fork. In theory, the longer fork can negatively affect handling, though I have not noticed any differences myself.
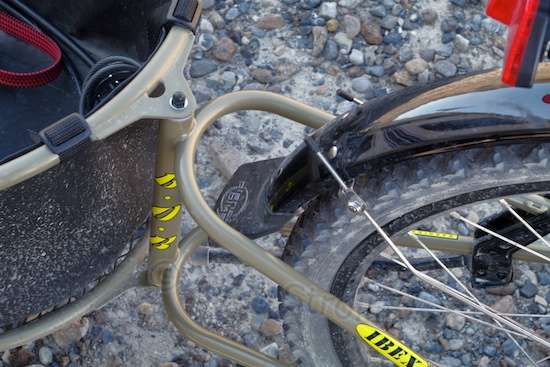
Now THAT’S clearance. The “28” fork perches the trailer’s true hitch point further aft (bad) to provide plenty of clearance for fenders, mudflaps, or what-have-you.
Still, use the standard fork if you think you can get away with it. This is because with the longer fork, the pivot point of the trailer is moved rearward, giving a heavily-loaded trailer more leverage to affect the handling of the bike. Whether it will affect handling is unique to the situation and the mechanical condition of the bike, so moving the pivot rearward without any real reason to do so is best avoided. It is imposing additional stress and force without needing to.
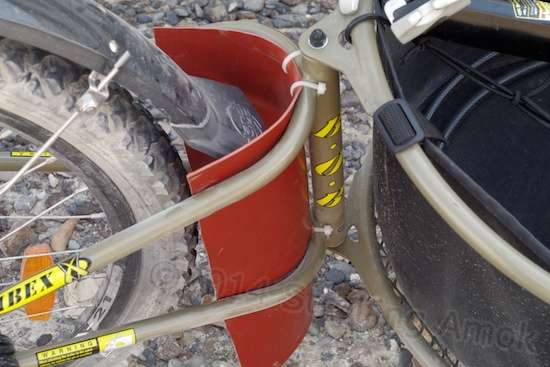
I rigged a temporary mudguard to keep the brine off the trailer and away from my camera equipment. Looks stupid. Works well. Once Bonneville was over, I snipped the four cable ties and removed it.
B.O.B. trailers have a reputation for trailer sway at speed. People who don’t have much experience with them tend to have the most problems, while those who have used them a great deal have since gravitated toward using them in the manner that its manufacturer recommends. Part of the accusations come from improper loading, and part of them come from simple physical dynamics in action, otherwise called “slop” and, sometimes, “carelessness”. The Beast of Burden’s reputation overall is very high, since very few other bike trailers are ever chosen for serious long distance work. A small but vocal segment of its users experience what they describe as trailer sway and try to warn others, but no competitive single-wheel product has so much as put a scratch in B.O.B. sales.
Look Out? Trailer Sway?
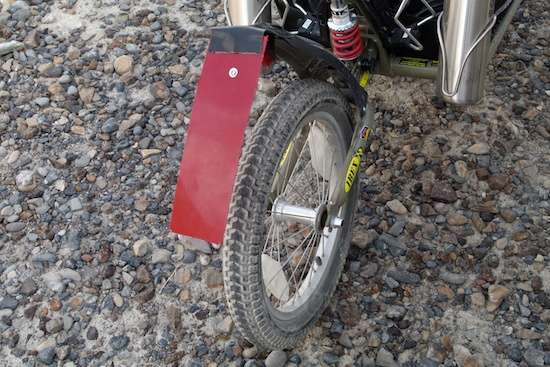
Hillbilly, anyone? This idiocy kept the salt from flinging forward into the basket. The red plastic was cut from the bottom of a kitchen sink tray. Held by the screw holing the reflector, it worked well until bumps bounced the end into the tire and wrapped it forward. If I go again next year, I’ll trim its length. Less expensive than buying a spare wheel and Yak tire and fender.
Riders who have experienced the onset of a rapid swinging of the B.O.B. trailer to one side and then the other sometimes have lost control and hit the ground, not surprisingly blaming the trailer and/or its manufacturer. It’s like the bike is a happy dog, and the trailer is its tail. Personally, I’ve never had any hint of true trailer sway on my Ibex at any load or speed. B.O.B. cautions against exceeding 25 MPH while towing, but I’ll admit that I’ve never exceeded 20 MPH coasting downhill with it, or 28 MPH sans trailer. Why? It’s a bicycle, with bicycle components, and at those speeds, I can distinctly feel the cold hand of physics approaching as it reaches dispassionately for my medical insurance card. I’m cautious, not gung-ho.
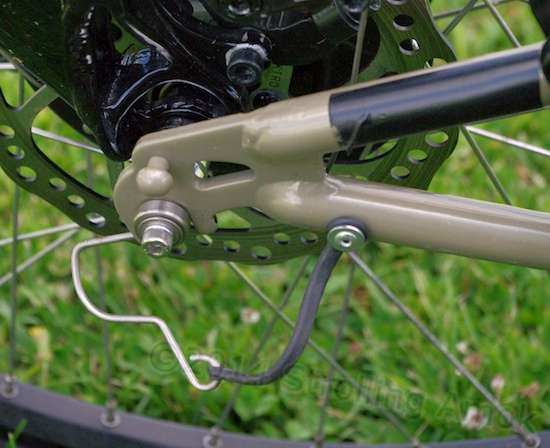
To attach the B.O.B. trailer, place each fork end over the roller end and slide the locking pins into place. They stay under the roller so the trailer can’t possibly release.
Those who crash will most often blame the trailer’s design, and take one of two tacks: malfeasance or incompetence. The malfeasance charge holds that there is some engineering lapse in this trailer that BigCorp B.O.B. refuses to acknowledge or correct, uncaringly allowing the carnage to go on. The incompetence charge holds that its design was just cobbled together from spare pipes in a woodshed in 1994, and that its hayseed inventors really have no idea of the actual dynamics in how it works, or that anything might be wrong with it. Thus, well-meaning or not, they are as incapable of purging its hidden demons as a ditch digger is of performing neurosurgery. I disagree.
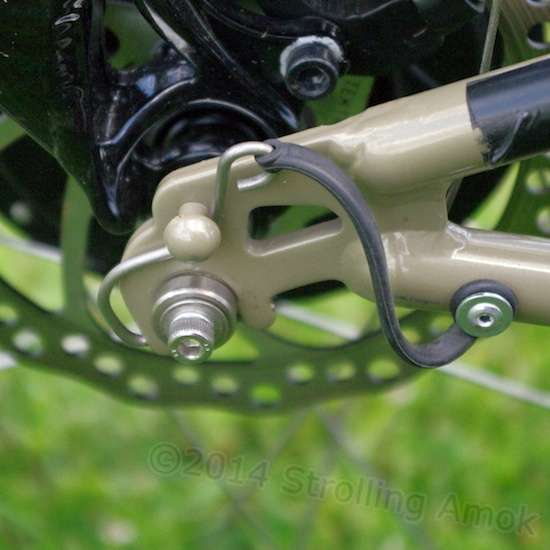
Once the locking pin is in all the way, rotate it up, and under the head she goes. Times two. How quick and easy is THAT?
Trailer sway does not “just happen”, anonymously waiting to spring out from the bushes. In fact, trailer sway has just one cause, with many possible branches of contribution. Trailer sway is guaranteed to result from anything which will momentarily allow the trailer to aim or steer itself slightly away from the bike’s direction of travel. Once out of line, anything which prevents the bike from simply pulling the trailer back into proper alignment can cause a wag in the opposite direction. Soon, you have a bicycle with a wagging tail. That continuance is the indicator that something is mechanically amiss. Speed magnifies any defect, and makes recovery more difficult.
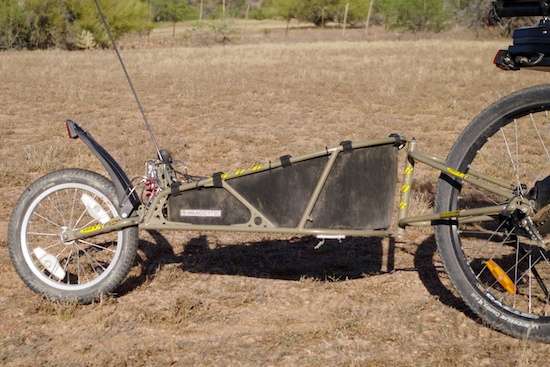
It’s a workhorse, day in and day out.
The only “problem” the B.O.B. trailer designs have is that proper trailer alignment depends heavily on the basic structural integrity of the bicycle and that of the trailer’s rear wheel. When that is lacking, anything goes. For true trailer sway, the most likely problem is poorly-tensioned wheel spokes that allow one or both of the bike’s rims to wander slightly off-center under load, this way and that. And the second most likely problem is like unto it, yea, a wheel rim that is out of true. That causes the tire’s contact patch with the ground to wander left and right. Third is a similar spoke/rim problem in the trailer’s rear wheel, which causes the rear of the trailer to go out of line, with similar results. Independently or together, each of these is fully capable of rhythmically yanking the B.O.B. out of line and forcing the dog’s tail to wag.
This is especially true since the front hitch of the trailer is not located at the bike’s wandering axle. It is the vertical hinge in back of the bike’s rear tire. Thus, any problem with the bike’s wheels imparts a greater side movement at the trailer’s hitch. Wheel spokes gradually lose tension with use, so it’s a first thing to check. “Well, still pretty tight” imposes a risk when there are other factors waiting to chime in. There are a myriad of other “helpers” that can contribute to trailer sway, like under-inflated tires, loose axle fasteners or sloppy bearings, cargo placement and height in the bed, road conditions, wind, and rider weight relative to the cargo load. Also in the mix is wheel design. Bicycles are not built to resist side loads, because there aren’t any in normal use. This is especially true of lightweight wheels, which often use narrow hubs that don’t give the spokes much of a stance. Thus the trailer’s dependence on good wheel condition. Sadly, I think that a rider’s experience and general competence is a factor as well. As with a car on an icy road, it’s easy to get into trouble when you don’t know any worse than wet-weather mode. It’s nearly as bad to see yourself as an expert, enjoying the sensations of riding a bike near the edge and then just adding on a trailer, loading it up and going. “I crashed! It’s that trailer!”

Some brag of speed. I value reliability.
The bottom line is that there is no geometry mystery in the B.O.B trailer that has been defying the gods of engineering for two decades. There are no demons that cannot be exorcised, unless the bike’s frame itself lacks structural resistance to side or twist forces originating at the rear stays, where the trailer’s fork mounts. Apart from that rarity, the base cause is stone-simple. It all comes down to observing the instructions that accompany the trailer, the ones that include assembly, usage and cautions. “Due diligence”, it’s called in court. If your bike is kept in sound shape, has good structural integrity, is loaded properly, and your daredevil impulses are held at bay, you will not see your Yak or Ibex trailer attempt to wag the dog. Cut corners or assume that you don’t need to be told how to use a stupid trailer, and your YouTube factor may rise and bloom. It’s no mystery that I will want to keep tabs on my Aurora’s wheel spoke tension as I rack up mileage.
As I mentioned, I have never seen my bike make my Ibex trailer sway. Once, during a rear tire puncture and collapse, the bike felt pretty squirmy, but the trailer just, well, trailed. Still, I have seen the Ibex make my bike “sway”! That’s a story in itself, a common trait when a heavily-loaded single-wheel trailer is attached to a step-through bicycle frame. That was a trait that I’d failed to anticipate when planning out my new Pack Mule. Fortunately for me, the result is still usable.
Do the Twist!
The commuter-oriented 240-watt Evelo Orion would be a good tow vehicle choice here because of its stiff diamond frame, though you’d have to make up for the comparative lack of motor power on grades. I don’t recommend the full-suspension Aries for any B.O.B. tow duty at all, because of the stress and flex that would be imposed on rear suspension pivot bearings. Two-wheel trailer? Fine. With the step-through 250/500-watt Aurora, I recommend against exceeding about 50 pounds of cargo in a B.O.B. Ibex trailer because, as a step-through bike, its frame is inherently less able to resist forced twist, which can radically affect your ability to steer and counterbalance when carrying very high loads. I can’t estimate B.O.B. trailer load limits for the 250-watt Evelo Luna, since I have no hands-on experience with it.
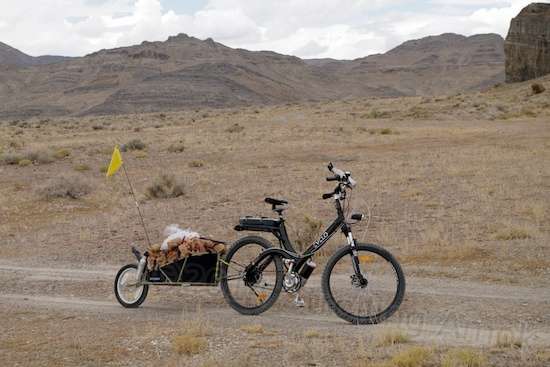
That is just over 100 pounds of groceries packed in on a 9-mile segment. It was too much like riding two unicycles, not helped by the height of the load.
In effect, high-limit Ibex trailer loads cause the Aurora’s wheels to go out of vertical alignment with each other as the frame twists, continuously changing your center of gravity over the two tire contact patches that are no longer perfectly in-line. And, this misalignment changes constantly as the load sways while you’re trying to re-balance. Effectively, you are steering the front wheel, while the bike itself is independently steering the back wheel. Your goal is to keep up with it, because it is acting and you are reacting. If there is any good news in this, it is that it is apparent from the get-go, not as a trait that hides in the weeds and unexpectedly jumps out at speed. It’s obvious from the moment you launch.
Please note that I cannot claim the same trait for the Yak trailer model because A] I haven’t used one, and B] it is lower to the ground overall, with a slight forward tilt instead of a slight rearward one. This difference may be enough to allow higher loads and/or raise the speed at which twist becomes apparent. Seriously. If I had any assurance that the Yak’s fork would physically fit my Ibex and lower the ride height, I’d try it, lower the Ibex’s suspension, and raise its spring rate.
Loads are best carried as low as possible in the Ibex trailer, and as far rearward as possible. Front loading aggravates that theoretical pendulum effect of swinging weight hung off the rear of the bike, raises the loaded trailer’s center of gravity to create more twist force, and biases more of the load to the bike’s wheel, which is structurally less stiff than the trailer’s own stubby wheel in back. Rear loading reduces pressure on the trailer’s hinged pivot, lowers the load’s CG and so decreases twist forces, and places more of the weight on its own stout rear tire. Good things. The Ibex’s rear suspension jacks the trailer up higher than the Yak’s fixed arms, which can create relatively more twist force for a given load. This makes the Yak the better default choice. In other words, if you don’t need the suspension, you’re better off without it.
Since I’ve only ever used an Ibex on my Aurora, I can only detail how the Ibex’s heavily-loaded trailer’s dynamics affect that one bike model. The Aurora’s unbraced rear chainstays (the two curved arms holding the rear wheel) appear to flex very little, if at all (in twist), but the main down tube (connecting the headset to the seat tube) flexes much more. Regardless, the bike’s down tube is massive, and is thick enough to keep the Ibex fully usable on the Aurora up to approximately a 50-pound trailer load. Normal precautions apply about proper, safe use because frame twist has a much greater effect at higher speeds. I have successfully hauled two AGM batteries in mine that weigh a total of 86 pounds, the only issue being a need to limit speed to 10 MPH to minimize the effect of the induced steering complications. I have also hauled just over 100 pounds of groceries, though that imposed a semi-safe speed limit of 7 MPH – with concentration. Pedaling firmly with such overloads imposes a much lower speed limit than making a concentrated effort to stay super-smooth with both steering and pedals. Going over bumps adds another layer of difficulty. Take it up to 100 pounds, and you’re going to a be a slow-moving, busy bee. Not recommended when pedaling along the side of a busy street.
If you’re going to regularly exceed 50-pound loads with the Aurora/Ibex combo, attach a Yak trailer instead. A two-wheel trailer might be the better choice, if you can find one with the load capacity you need. Two-wheel trailers attach differently, whether that be to axle or seat post, and impart practically no structural twist force to whatever they attach to. With a dual-wheel, the sky (and your foolhardiness) is the limit. With higher weights, I recommend that the attachment point be at the axle. Clamping to the seat area can impose high-leverage forces on braking and turning that you don’t want. The 500-watt Aurora can be a bare-knuckle towing beast with a two-wheel trailer, particularly if a smaller front sprocket is called for because of terrain. Here, the Aurora’s style-biased frame design makes no difference, and its mid-drive can be turned loose, gloves off.
Please note that these potential twist issues are not unique to the Evelo Aurora, Luna, or Aries, but apply to all step-through bike frames and all rear-suspension bikes across the board. The Aurora’s massive single down tube is very stiff for normal duties, but with nothing else between the headstock and the seat tube, there are limits as to how well it can resist forced twist. Shying away from the Aurora and going to some other step-through e-bike will not improve the results with a one-wheel trailer, and may worsen them if the bike has a less robust down tube size (which is usually the case). Traditional diamond (“boy’s bike”) frame bikes have their limits on twist forces, but they tend to surface only at higher speeds, where perfect tire tracking is more critical to maintaining balance. If you must have a step-through and tote high-weight loads, use the Aurora with a two-wheel trailer. Have I said this enough times? Almost. Some people stick entirely with pannier bags mounted on the bike itself, and it is technically possible to do with the Aurora, given the “choice of one” front and rear racks. But this usage wanders far enough away from general utility purposes that I’ll simply set it aside.
I’ve hesitated to write this section, for fear of readers misunderstanding my point. My point is not that step-through bicycles like the Aurora are flawed and are thus some kind of accursed choice, or that B.O.B. trailers are the same. My point is that true step-throughs like the Aurora and Luna models are inherently less adaptable to certain odd combinations of equipment. I bring it up and detail it here since, if trailer load weights get high enough, it presents a potential control issue. That issue stems from combining a tall, heavily-loaded single-wheel axle-mount trailer with a step-through bike, and that I have observed this to be a problematic combination on the Aurora as well. Decrease the Ibex trailer’s load, and the severity of the problem decreases. Switching to the lower Yak trailer would probably decrease it further. Heck, I’ve corresponded with one Aurora owner who claims to tow my identical setup with 100-pound loads regularly, and without any issues. I can only speak to my own experience. It works for me because I limit speeds and loads but, generically, it would be better to choose another trailer type to pull if loads or speeds will be considerable.
Regardless of bike frame type, the B.O.B. trailer can induce tilting and balance issues in a strong side wind, depending on how aerodynamically bulky your load is. Your own body’s air resistance creates the same tendency, in spades, but the added push from the trailer feels “foreign”, and takes some getting used to. Naturally, any mechanical issues with the bike will tend to magnify the effects of gusty side winds or jerky steering corrections.
Since I have an Aurora, would I choose the B.O.B. Ibex trailer again? For my needs, yes. I initially envisioned 40-pound loads, and that has panned out except for the occasional surprise load where the Yak might have been a better choice. Its single-wheel tracking is indispensable on both dirt trails and in-town traffic, where a two-wheel trailer presents a significant risk of catching a violent bump or dip. You simply need to think about where you ride, how much you want to carry, and choose accordingly. If in doubt, choose a two-wheel trailer, and live with the tracking issues, if any. Since I have no stake in what you select either way, I don’t need to “sell” the Beast of Burden’s strong points and cover over it’s weaknesses, as you have read. Since, as an Evelo Ambassador, I do have a small financial stake in whether you ultimately purchase a Evelo e-bike of some sort, I’ll let you decide from the above section whether I’m willing to knowingly compromise myself in order to make a buck off people I’ve never met. I’m enthusiastic about Evelo’s entire product line, you bet, and my 500-watt Aurora’s willingness to get the job done is impressive. But I won’t knowingly steer you wrong in order to “get the sale”.
Bike carrier
Last and by far not least, is the ability for me to transport both the Aurora and the Ibex from campsite to campsite. My own rig’s setup (pickup truck with bumper-pull travel trailer) practically required the carrier to be mounted ahead of the pickup, but the plus of doing this is that it spares the bike from the often impressive swirl of dust or wet mist behind the rig. My intention to break out and use the bike to scout for trail conditions and campsites in unfamiliar areas made it critical to select a carrier that would allow very quick release of the Aurora. My final choice works much better than I had hoped.
The lack of a top tube on the step-through Aurora makes simple hanger-style bike carriers unusable, and carriers that can safely handle the weight of one or two e-bikes are uncommon. Sure, bolt-on top tube adapters are available that “create” a top tube on a step-through bike, but you will lose paint and it will never work right. It’s just a hassle. Evelo can provide you a source link if you ask, but my haughty disapproval of these will get you nothing here.
- My first recommendation here is to avoid using any carrier near its specified weight limits. Err on the side of safety, and do not press an ordinary bike carrier into service for an e-bike, even if a carrier is rated for two 35-pound bikes. You might get away with it on the rear of a softly-sprung passenger car with bad shocks, but anything stouter than that will create shock loads that will start causing bending problems, or worse. Use a quality carrier rated for e-bikes. Never mount a cheap bike carrier in front of the vehicle to mimic what I have done, or you stand a fair chance of running over it and very seriously damaging your vehicle.
- My second recommendation is to select a carrier that supports the weight of the bike by its tires/wheels. That is a must for the Aurora, but the the additional benefit is that the bike is more securely held and is easier to lock into place.
- My third recommendation is to select an e-bike carrier that mounts to the vehicle via a trailer hitch receiver. This is not an imperative, but these carriers easily take the weight, are easy to attach and remove, and avoid the collateral damage and high inconvenience of attaching to the vehicle’s bumper and bodywork with clamps, straps and clips. The more of a hassle you make for yourself to mount the carrier and then load and unload the bike, the less appeal going out for a bike path ride will have. You just won’t bother, and I can’t blame you. Choose end result over cost. It’s worth the lack of frustration.
- Fourth, do not mount any type of bike carrier on the rear of a travel trailer (or any other trailer). They simply will not withstand the rapid bouncing that these trailers cause, even with a half-load. If you do take that route anyway, be sure to at least aircraft cable the bike to the trailer’s bumper so that you won’t be liable for the damage when someone behind you runs over it or causes an accident to avoid it laying in the road. This handy trick also allows you to detach and temporarily place what’s left inside your trailer, so that you may discard what used to be your $2,000 e-bike in a suitable dumpster on-route.

Travel mode. Surprisingly, the bike does not interfere much with the pickup’s lighting at night (which I very rarely transport during).
My preferred solution is the Hollywood Sport Rider SE2 HR 1450E e-bike carrier, an excellent heavy duty unit that quickly adapts to just about any combination of equipment. It’s not designed for anything but two e-bikes or regular bikes, but with careful adjustment, securely carries both my Aurora and my Ibex trailer with ease. My pickup’s rear trailer hitch is already in use for the travel trailer, so I added a front hitch receiver to my pickup, and haul it up front. That makes a secure hold all the more important, since dropping the bike, or the bike and carrier up there and running over it on the highway would have very, very expensive results.

This adjuster and a specially braced frame makes for minimal rocking on bad roads.
The 1450E is exceptionally easy to load and unload, and includes a hitch binding mechanism that eliminates the side-to-side rocking on rough roads that would ordinarily be caused by the necessarily loose fit of the main post into the hitch receiver. This carrier is hinged and is easily flipped up vertical when not in use, decreasing overhang. It is also easily removed from the hitch, though it’s heavy enough to be challenging to handle for us weaklings. A high quality hitch lock and long, coated cable lock with matching keys are included. Its assembly instructions can be confusing since they are missing a few things, but the simplicity of the carrier itself compensates for this. The 1450E is expensive, and I consider it a bargain that’s exceptionally quick and easy to use. After the hassle of add-on, strap-on carriers that discourage you from getting out there and biking, you’ll kick yourself for not getting this first and avoiding all that aggravation.

That bike’s heavy, and I have to load it one wheel at a time. Thank God I don’t use a top tube carrier any more, where the whole bike has to go up at once!
A caution: Hollywood makes similar-sounding models, and at this point Amazon neither carries them nor identifies any of them properly. If you have an e-bike, do not think that Amazon will be saving you $150. Those are for ordinary bicycles, and work great for them.
A second caution: Evelo has recommended to me that when carrying their e-bikes out in front of the vehicle, that the bike be positioned to place the sprocket side rearward, so that rain and filth are not driven through the thin gap in the housing surrounding the drive’s ratchet area.
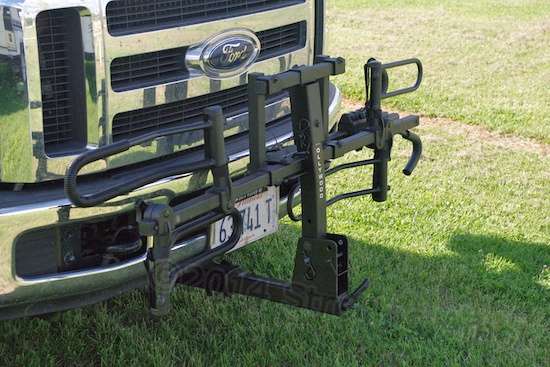
Remove one tethered pin, fold up, insert pin.
A third caution: The locking slide hooks on the rack’s vertical pole may or may not work well if two true step-through bikes are loaded. The hook on one slide is longer in reach than the other to keep them from competing for pole real estate when two identical bikes are loaded. The problem comes when both bikes are equally-low true step-throughs. The hook with the longest arm may bottom out before it can yank down that bike’s frame. The carrier is extremely adaptable to hold different bike styles and sizes at the same time, but two very low step-throughs may stymie it. It’s a very individual thing that can’t be accurately evaluated ahead of time. There are work-arounds that will blunt some of the ease of use, but out of the box, this may be an issue for some. I have yet to discover if it will cinch down two Auroras at the same time.
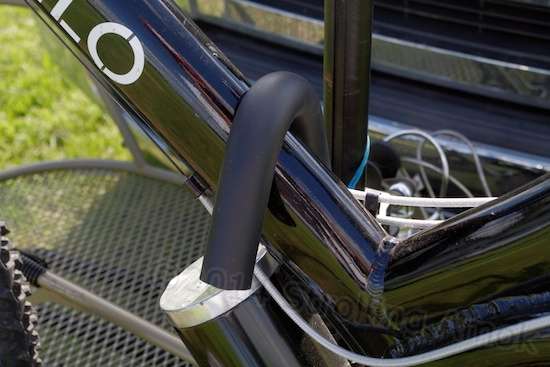
The padded hook goes down over the bike’s frame to keep it upright and deep in the wheel hoops. Constant travel movement will eventually wear through the frame’s paint at at least one location, so draping tape over the frame might be a good idea. The hook is supposed to be at the bottom “V” of the frame, but also carrying the trailer compromises the overall setup. I was as surprised as anyone when I got the Hollywood to swallow both bike and trailer successfully.

Lift that lever and the hook slides up or down without any fooling around. Bang.
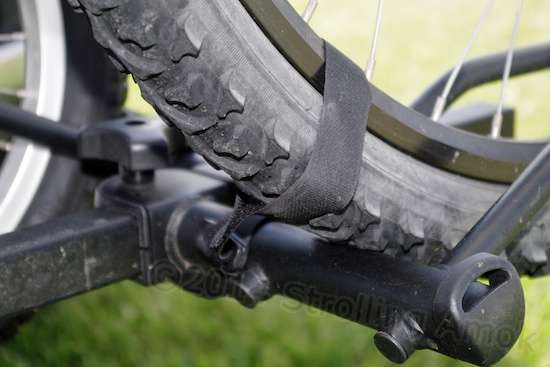
Velcro straps discourage any rolling out of the hoops if the hook is not in an optimal position on the frame (which is the case with my Aurora & trailer combo). The Hollywood allows for the hook to be located at the lowest point on the Aurora, but accommodating the Ibex properly throws a wrench into the mix, so I’m careful to use these Velcro straps to keep the bike from getting naughty in the rough stuff. They work.

Well, it’s hard to forget it’s there when you’re parking in town!

The hoops slide easily along the beam, and then clamp to fit just about any conventional bike or e-bike. I added a wrap of electrical tape and wiring protector to slow down paint loss and rust. The Ibex’s expanded steel bed lays right on top of the hoop on the left.

Ready to roll. The trailer’s wheel is buried deep in a hoop, and the basket is on top of one. There’s no need to strap it down – merely discourage it from front-to-back shifting.
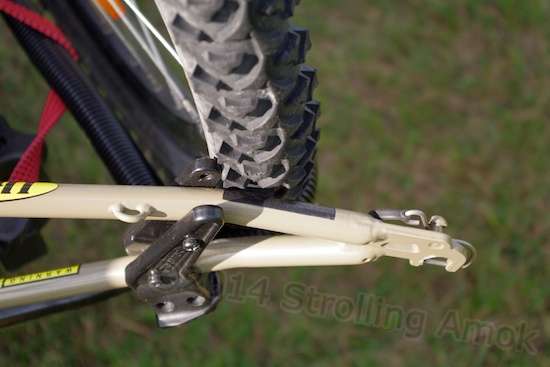
A tape strip saves the paint on the trailer fork.
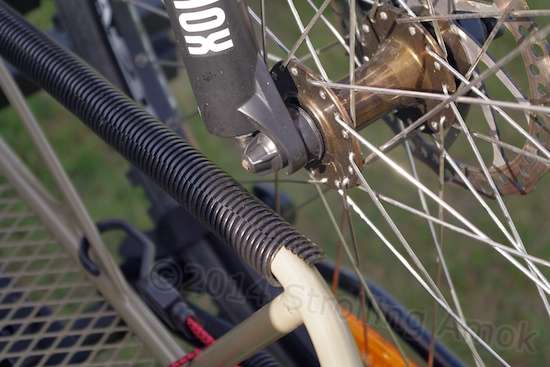
Wiring protector saves the paint on the trailer tubing (I hope!)

It’s close! The Hollywood is not made for anything but bicycles, so hoop adjustments must be just so if you’re going to get nutzoid with other equipment. Here, the King Iris and Schwinn water bottle cages prove just right.

Before placing the bike, the right-side pedal position needs to be fixed first to avoid interference with the pole. Setup adjustment was made more complex by facing the bike’s chainwheel rearward, but it worked out.
I’ve made other minor, ongoing mods to the Aurora, Ibex trailer, and Hollywood bike carrier, but those are even more unique to my situation, and are best caught in the various posts on this blog.
The Trans-American Electric Bike Tour

Boy, here’s a motley looking pair! Boris Mordkovich, an adventurous sort who is heading up Evelo but can’t seem to keep a job (serial entrepreneur), and Anna Mostovetsky, an environmental scientist with the same penchant for challenges and career mayhem. They got guts. Here, they prepare to depart New York.
This tour crossed roughly 4,000 miles in 75 days, and the blog recording this trek contains a goodly amount of both information and inspiration for the realities of pedaling long distances on a schedule, as well as bios of the two principle suspects. My own desired takeaway, however, was the greasy underbelly of all long-distance road biking: the breakdowns and crashes. No bicycle is going to go any significant distance without something breaking or getting damaged. The extreme lack of power demands light weight, and light weight promotes fragility. If you insist on durability, you either pay up, or slog dead weight up every grade. Adding a motor adds power, but also adds weight onto bicycle componentry. My morbid interest was to look for trouble more than to gain inspiration, since my heavily-optioned Aurora would cost me a good chunk of change. It turned out to be a worthy investment, but I didn’t know that beforehand. (All photos here were remorselessly liberated from Evelo’s website.)

Likely on the boardwalk in Atlantic City, NJ, they’re goofing off already. But Anna’s white Aurora does look nice.
The bikes were an Aurora pulling a B.O.B. Yak single-wheel trailer, and a full-suspension Aries pulling a two-wheeled Burley Nomad trailer. Both were 250-watt/36V standard models, and both appeared to use NuVinci gearhubs. Except for occasional Ergon road-style grips on the Aurora, everything looks to me to be more or less stock. Cargo consisted of spare batteries enough to exceed 100 miles range (I’m guessing at least two spares each, which allows for hilly terrain and bumping average speed a tad, if required), chargers, laptops, promotional stuff, clothing, personal care items and just enough beef jerky food and beer water for short-term lags in facilities. Staying in motels or what-have-you on the way, this was not a camping voyage. Neither was it a pleasure tour with no responsibilities and an abundance of time. They either had to make the next stop, or improvise accomodations.
Evelo Aries with Burley Nomad:
- 2 blown-out trailer tires
- 5 trailer flats
- 3 bike flats
- 1 broken chain
- 1 snapped NuVinci cable
- 1 broken trailer arm
Blowouts on a trailer are largely from impact events (something to think about), while both trailer and bike flats appear to be loosely karma-related. No doubt these are standard tires and tubes, which began to impress me as something to work away from. Plus, on-road repairs to flats would need to be a certainty. The broken chain is a concern, but that can be a highly individual thing. With just a 250-watt motor and an athletic kid pushing it, it could be lubrication, or could be simply a flawed link, more likely. The NuVinci cable is a concern. Unless a spill took it out, the odds come down to flaws or problems with adjustment that caused binding. Still, a cable break is no reason to get spooked about the bike it’s attached to, and the NuVinci can be set into any available ratio for continued travel, which is the prime consideration. Broken trailer tongue? This was hopefully the ultimate result of an accident, because otherwise, this does not bode well for the Burley. Once that arm snapped, the Burley had to be strapped on top of the Yak to continue on. Hmmm.

Well, made it to Michigan, and Boris did what I do: he gawped at the scenery too much, and crashed and burned off-path. See how the Yak model is lower to the ground than my Ibex, and tilts slightly forward? Better for towing stability.
Evelo Aurora with B.O.B. Yak:
- 1 blown out trailer tire
- 1 trailer flat
- 1 broken ball bearing
Probably again the result of an impact, these trailer blowouts made me begin considering a suspended trailer wheel to try to decrease the slam factor. And that flat tire underlined the need to upgrade the trailer tire tube somehow. The failed ball bearing is a biggie, location unspecified. Then again, considering that Chinese-made e-bikes are not exactly specifying Timken, SKF or NSK bearings these days, it’s a crapshoot. The Aurora’s overall lower parts attrition rate probably has to do with its fairer and gentler female rider, and the fact that she missed a segment of the trip due to illness. Still, I would have expected more problems.
The Evelo Aurora as a Pack Mule
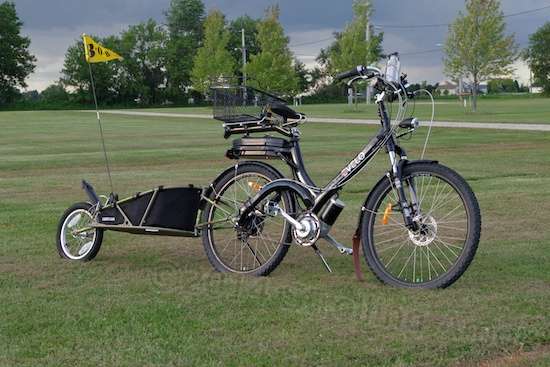
Ready for anything, ready for everything.

Since the NuVinci hub has no gears or fixed ratios, this indicator is indicating that the hub is set for the highest numerical ratio available (lowest gear).
This page will be updated on a periodic basis as any further changes or additional parts are swapped in to replace the originals. As of about the 9-month mark, my Aurora has just 1,200 miles on its odo. By road bike standards, that isn’t much at all, yet these are a far cry from smooth road miles and the pampered life that most road bicycles lead. Outdoor exposure is 100%, heavy loads are the norm, and the majority of its miles are on steep, rocky and dusty trails. “Maintenance” consists of occasionally toothbrushing the filth off the sides of the chain and lubing it, watching for the need for cable readjustments, and knocking the quarter-inch of accumulated dust off the draft side of the pedal cranks. My personal conjecture is that bicycle mileage is to car mileage as dog years are to human years. Perhaps, 1,000 bike miles are equivalent to 20,000 car miles. But that’s pretty rough to gauge, since usage conditions have such a big impact.
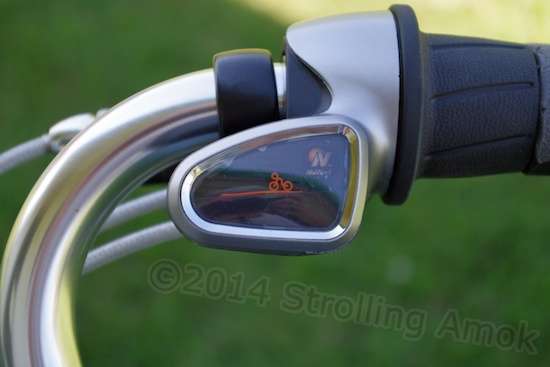
After I rotated the collar, the NuVinci is now showing that the hub is in the highest available gear (the lowest numerical ratio). The hill gradually flattens or rises as you twist the collar, indicating what the current ratio is most suitable for. Slick, huh?
My own goal for the Aurora is that, although the original chain will never make it in these dusty conditions, 5,000 miles or 4 years will be a reasonable number to hope for before something big goes away. The battery, unlikely. Only so many cycles can be reached, but if everything else hangs in there, quite a bit of stop-and-go wear and tear on the irreplaceable Ford diesel F-250 pickup will be avoided. It’s not so much that the bottom-line cost per mile of an e-bike is super-low. It isn’t, at least at my wild and ignorant guess for how many miles it may be good for. The issue is that the capital cost of replacing the tow vehicle is so brutally high that extending its service life even a little is well worth it. Technically, my Aurora can be viewed as kin to the regular maintenance expenses that the Ford requires for long life. Unlike changing oil and various filters however, the Aurora also serves as enjoyable and necessary exercise. It’s like the cost of an included health club membership, with facilities right outside your door.

Frankly, the odds are that the stock Aurora or any other Evelo model will have more than enough suds to do whatever you want, as-is. All I did was to start strapping stuff onto it!
Not to boast, but this is not an easy test for an e-bike. It is worked hard under demanding conditions, left out in the sun and rain, and largely ignored. “Easy” is a flat but dusty 3-mile trip to town and back to do laundry or pick up more champagne and caviar. “Moderate” is an 18-mile trip on pavement with a loaded trailer, half of that requiring an average 400-500 watt pull on the motor. More common is a hilly gravel trail demanding 700-watt climbs at points, on a half-dead battery. Now and then there’s the exploration without the trailer, repeatedly tripping the motor’s 850-watt automatic shutoff as the almost-irresistable force meets the immovable deep sand climb. For a mid-priced commuter e-bike, this is abuse, plain and simple. Yet the Aurora never whispers a complaint. Trip prep consists of loading a water bottle, connecting a charged battery, and going. Day in, day out. Its mid-drive saves power usage on the hills, and always gets me to Point B. Not too shabby, in my book.
Repairs so far:
None. The spare 48V battery I ordered showed possible signs of swelling when received, and Evelo requested its prepaid return and sent me another.
- I recently readjusted the slop out of the steering tube, likely caused by my earlier installation of the Delta Stem Raiser. Soooo easy. Took two minutes.
- When I wrote Evelo about my concerns with possible drag in the NuVinci hub, a series of emails to diagnose what was going on pointed out that the hub’s internals do inherently have more drag than the freewheel used on a typical derailleur setup, but their concern was whether it might be excessive. It wasn’t, and they suggested taking the disk brake out of the equation, linking to a YouTube video on how to adjust these consarned newfangled disk brakes. Turns out they both needed readjusting from ordinary wear. That took about ten minutes to reach perfection. Drag decreased to what I consider acceptable levels, given that I wouldn’t trade the NuVinci in for anything else.
- At about the six month mark, the 48V charger supplied with the bike failed, and Evelo quickly replaced it without requiring a return.
- A year after being exposed to weather full-time, the clear outer wrap on various control cables began to fracture and fall off. This is from the constant exposure to UV rays. It’s not a repair item at this point, because cable function is completely unaffected so far. I’m just noting the event. No bike cable made is immune to such exposure (as far as I’m aware), so the only remaining questions are when the OEM cables will start to bind, and what they will be replaced with. These must have some inner lining, because I’ve been expecting them to freeze up, and there’s been no hint of it.
- In December 2015, the “spare-replacement” 48V battery ordered with the bike failed. On the charger, it acts like it’s taking a charge, but once installed, it flashes the display once before going blank. Unfortunately, it’s out of warranty, which means that replacing it will now cost $700. Yow. So, I’m relegating myself to going on with the pack delivered with the bike. We’ll see how that works out. To be economically viable, packs like this really need to last at least three years, not one-and-a-half. I may have to look into alternate battery packs not only from a cost standpoint, but because at 2 out of 2 early failures, the spares that Evelo carries are not worth considering.
- In March 2016, approaching the 3-year mark, the OEM Samsung battery is showing definite signs of weakening. With the new tour season approaching, this is unfortunate timing. A few other “13S4P” packs are available, my main question being adapting their wiring and whether I have a prayer of fitting one inside the Samsung case, which would ease usage a heap. Such packs range between $250-$300, less than half of Evelo’s pack.
- By December 2017, the OEM Samsung battery was only marginally useful, so I ordered a so-called “Vpower” 48V 10Ah lithium battery off eBay for $230. This is as close to a plug-and-play unit as I could find, although an extension cord adapter had to be cobbled up to get around Evelo’s semi-proprietary connector. This was easily done by liberating the old battery connector from the case and using a connector supplied with the new battery. The full story is in this post. The NuVinci “gear ratio” display on the handlebars has seeped enough dusty moisture under the crystal as to make it unreadable. This is an appearance problem only, since you basically don’t refer to it anymore once you get used to using the system. It’s easy to tell where you are on the ratios simply by pedaling, and the firm stops on the twist control let you know when you’re at the limits of either end. The finish of the frame surrounding the Evelo’s main power display has bubbled and deteriorated due to the heat absorption of its black color. As a result, the display doesn’t look too good, but still works fine. Close to four years of constant weather exposure and abuse have not helped the Aurora’s appearance, but it’s functionally still hanging in there in all respects.
If wishes were fishes…
What would I change that cannot be modified?
- I’d like the digital display to allow a programmable auto-off time instead of the one-size-fits-all timer now used. Even better would be an internal battery in the display that holds the trip odo reading instead, resettable by the user to start over. That’s because the current system loses your trip odo reading while you’re buying your beef jerky and jug of Ripple in the store. An auto-shutdown loses how far you’ve just come when there’s still more to go, and neither my memory nor my waining simple arithmetic skills are enough to reliably compensate on a multi-stop errand.
- I’d like a more collapse-resistant kickstand. The stock one uses a telescoping arm held by a cinch screw, and it creeps over time. On the Aurora, it’s at its length limit and doesn’t really reach out to the side far enough to stabilize the top-heavy bike, either. There’s too much weight and money riding on an e-bike to depend on a marginal kickstand – tipovers can get expensive.
- I’d also like shorter handlebar twist collars on the throttle and NuVinci shifter, to widen aftermarket handlebar and grip choices. But that’s not realistically going to be able to happen. Evelo does not control the design of those systems.
- A carrier rack atop the Samsung battery that is wider and more robust would be nice, though the unified rear chain stay/seat stay arms still work against keeping hanging panniers out of the wheel spokes. Still, a better rack would help avoid having to add the Topeak carrier rack. I doubt that Evelo has any control at all over this, either.
- There are neat gizmos made to clean the bike’s chain, to which you can pour in a little cleaning solvent. You basically clip them onto the chain and slide them along the exposed length, which causes rotatable, solvent-soaked brushes to scrub the chain clean. On a derailleur bike, slowly pedaling the crank backwards cycles the entire chain through. The Evelo’s drive system with the optional NuVinci hub poses two problems here which prevent use of these devices. First, backpedaling does not spin the chain backwards. There are ways around this, but the second problem is that the chain tensioning system, at least with my modified setup, does not allow enough slack to attach the cleaning device. The only ways to clean the chain are old-school methods.
- Lastly, it would be nice if they revamped the motor-to-chainwheel speed relationship just a tad. Right now, the system promotes slow pedaling, and the motor’s power comes onboard strongest at a somewhat slow pedaling speed. I’d like to have power come in most strongly at a one crank rotation per second rate, which is still far from a cycling junkie’s much faster cadence. But such a change is possible only at the basic drive engineering level, and chainwheel changes merely affect your (and the motor’s) relationship to rear wheel speed, not the motor’s relationship to the chainwheel itself. Obviously, nobody’s going to re-engineer the initial drive ratio without a serious reason to, so that’s not going to happen. That’s okay – it’s just a preference.
Yet, all these wishes don’t mask the fact that the Evelo Aurora can, with minimal effort, extend well past its original commuter design goals to become a tough and capable hauler over considerable distances on varied terrain. All of the basic engineering is already there, and not many e-bikes share that ability. It you look back at the initial functional requirements just to be able to get out of my opening gate, the list of potential contenders is slim indeed. And considering Evelo’s price point, it becomes a steal. All I’ve done it to take advantage of it in order to meet my needs.
— finis
Please Note:
The links I’ve referenced above go to either Evelo, Amazon, or to other bicycle parts vendors whom I have personally dealt with and approve of, based on past experience. Should you actually purchase any e-bike model from Evelo by using any of my links to them, I will get a few bucks out of their pocket for the referral, not your pocket. Use the “StrollingAmok” discount code to knock $100 off of list price. They may have a sale going that saves even more than that, so use the code if there is no sale or if their current “off list” sales price is less than $100. If you want to wait in the hope of larger sale, that’s fine, but just don’t sail right through your riding season without an Evelo. That would be a shame, since they are a very good value as-is, at full-boat. Don’t let the new pleasure and fun of your riding season get screwed up just to save a few bucks. You’ll kick yourself later, once you finally get it. Evelo offers a “try before you buy” program for test rides with local owners. I see that as ironic, because their e-bikes need such a program the least of anything out there. I have yet to receive even a lukewarm reaction from anyone who has boarded the Pack Mule and taken the time to put it through its paces, even with its filth and wonky seat. Comparing it with the dominant brands only drives home its value, since the most enthusiastic responses have come from existing e-bike owners who find its mid-drive hill climbing ability unique.
The other links to various parts vendors get me squat, but they are worth including because they have previously come through for me with reasonable prices, prompt shipping, and very favorable responses to inquiries. I personally endorse them. I link to the supplier I’ve used and would definitely buy from again for that component. Buy from whomever you like, but I recommend these sources to you. I’m not associated with them in any way.

Great write up very informative. Did you manufacture the bracket for the kickstand?
Thank you, Anthony. That kickstand comes just the way you see it. It’s really designed to attach to the rear stays of a bicycle, but the BOB’s fork design is such that it fits it perfectly. The Aurora’s weird frame design does not allow it to bolt onto it, solo. It fits only the trailer.
I loved all this information and started building a folder of your links. I ordered a Luna today because I simply felt I could not handle getting up and over the Aurora with my arthritic knees. I will need a trailer because I go to a lot of rehearsals and carrying a mandolin, ukulele, and/or my U-bass will take some space. I am also puzzling how to take the Luna on camping trips. I travel alone often and my bike carrier on the back of the trailer is not sturdy enough for an ebike or am I for heavy lifting. The tip of loading it one wheel at a time was brilliant. I will re-read the section about mounting on the front of the truck with the trailer behind. Thank you for sharing all of your experiences. This really helps me as a neophyte!
Thank you. Sharon. This page is pretty much of an exercise in Too Much Information, but figuring out exactly how one might carry out what needs to get done can be a puzzlement that needs thinking through, and you’re doing that. Many carrier manufacturers advise against using their carriers on the back of a travel trailer because of the violent bouncing. I have a cheap Swagman for RV bumpers that bent from carrying one bike that weighed less than 30 pounds! But I notice that they also make a two-bike hoop carrier that slips over an existing ball mount, to not interfere with towing a trailer. Downsides: it’s rated for two bikes at 40 pounds each, and putting a heavy bike on it will be more difficult with the trailer still hitched up and in the way. But it’s a start if no other option surfaces for you.
The extra expense of adding a front hitch was worth it to me, the trade-off being that the bike collects smashed bugs up front rather than dust and muddy mist in back. And of course it allows an open choice for e-bike carriers, with towing ability unaffected. If carried in front, Evelo has advised me against loading their bike sprocket forward, so I load mine with the handlebars toward the passenger side. This helps keep driven rain out of the bottom bracket, and is the same reason they advise against pressure-washing their bikes. Failing that, an improvised strap-on sprocket cover would be needed. Carried in back and close to the vehicle, I wonder if a decent bike cover bungeed on could slow down the filth spray back there. Not a good idea in front! At any rate, enjoy your new Luna and whatever bike trailer you choose!
So, the front load carrier option looks great for me towing my rPod but…..since the Luna has a higher handlebar profile, I wonder if I can see past it from my Toyota Tacoma pickup. Thoughts? I can sell a banjo to pay for the carrier!
Good news and bad news here, Sharon. My Aurora’s mods put the handlebars higher than the Luna’s, and I don’t have any significant forward vision difficulties, but there is some visual blockage, and your Tacoma is unlikely to match the Ford’s “bumper to eyeball” vertical height. Look again at the above photo of the front of the Ford, bike in place. Conceivably, what is just above the hood for me could be on the horizon line for you. The bike’s seat right in front of you could pose an issue, though it is easy enough to lower or pull out of place. The handlebars don’t have much visual mass, but might be an intimidating distraction for you in urban driving. The bigger question is potential blockage of the headlamp beams by the bike’s tires. The Hollywood carrier allows offsetting the bike(s) to one side or other so that tires are not right in front of the headlights. I have not done this, but it is still drive-able at night. I try to avoid night driving in general, anyway. In short, though it works for me, it might not work for you. Once you get your Luna assembled, you could try to get a rough idea of the situation by setting it upright at the front of your vehicle with tires resting on boxes that come about even with the bottom of your bumper. When you sit in the driver’s seat, what you see is fairly close to what you’ll be dealing with.
One step at a time, then. The Luna arrives tomorrow. After assembly and adjustment at my local bike shop, I will have a go bringing it home and getting it up our very steep hill. Then, I’ll work at the bike rack solution. The box idea was great! Many thanks!
Super detailed and fun to read. You must have spent countless hours writing this entry. I am saving for future reference! Thank you.
Thank you, Joe, and welcome! “Countless hours”, yes. I figured, why not provide as much info as I could, just in case anyone is considering such a bike.
Hi Doug, all you need now are handlebar streamers, a baseball card and a clothes pin. Just kidding :-). I’ve been enjoying your site so thought I’d pop in and say hello. Tons of great info, thank you for sharing! I’m hoping to buy a Grandby for myself next year if all goes well so I very much enjoyed reading your process of selection. Take care, Mary
Thank you Mary, and welcome! You’re not that far off on the e-bike! If you’re seriously considering a Grandby, you may wish to select the category Intrepid here, or do a search for that or Grandby (and Granby because I occasionally misspelled it). I haven’t had mine all that long, but it has been all I’d hoped and is holding up well to my abuse.
Hi :-).
Ha, I haven’t read your entire blog up there, but will when the time comes to add a bike to my rig. Again, thank you for sharing all that great info. An electric bike (or partial) might be a better idea now that I’m older. I hope to boon dock way out in the boondocks a lot by myself and would hate to get stuck and have to bike/walk for miles. And probably just for exploring fun, too without getting worn out.
Glad to hear your camper is serving you well. I’ve been thinking about this big change for about three years now, exploring different options but I keep coming back to the Four Wheel for the way I want to live (simple).
Well, take care Doug and may you find cool, dry and sunny elevations!
Thank you, Mary! The caveat with an e-bike is its greater weight, so you would probably need to pair it with a carrier that allows you to lift only one end of the bike at a time. On campers, take your sweet time in determining just what you would want your daily experience to be like (activities, hassle factor, etc) and research a bunch. You only want to hardware-up once!
I am very happy with the stock Orion I got last month. I rode it 12 miles today, and am thinking about a different seat! A little sore, but not too bad. There are a lot of bumps and rocks, as well as sand, where I ride here in Prescott, AZ. But, the “hornless” saddle you have looks very uncomfortable to me. As a more experienced rider than I,is ther a middle of the road bike seat that could be OK for the less dedicated rider than yourself?
Dedicated, I’m not, Chris. I’m just avoiding further prostate damage, which my best info indicates that you lack. I still recommend a seat with a pronounced groove down the center, however. I’ve had very good results with Serfas seats, particularly their RX series. They also make gel models as well as sprung saddles with some give to them. Try this page: https://www.modernbike.com/seats+30womensisyes+availableisyes+brandisserfas. Unfortunately they aren’t cheap saddles, but your petute is worth it. Cheap seats are what hurt.
Doug,
I noticed the red electric motor on your Aurora. Did the original motor require replacement? With all the miles that you have put on the bike, have you needed to replace any gearbox components? I really enjoy reading about and learning from your experiences! Take care.
Paul K
Thank you, Paul. Nope, except for a replacement lithium battery, nothing has been replaced from need. The motor and mid-drive mechanism are running just as they always have. One thing this bike is not, is temperamental. I would like to think that Evelo’s updated powertrains are at least as reliable.